How to Crochet a Granny Square Step by Step
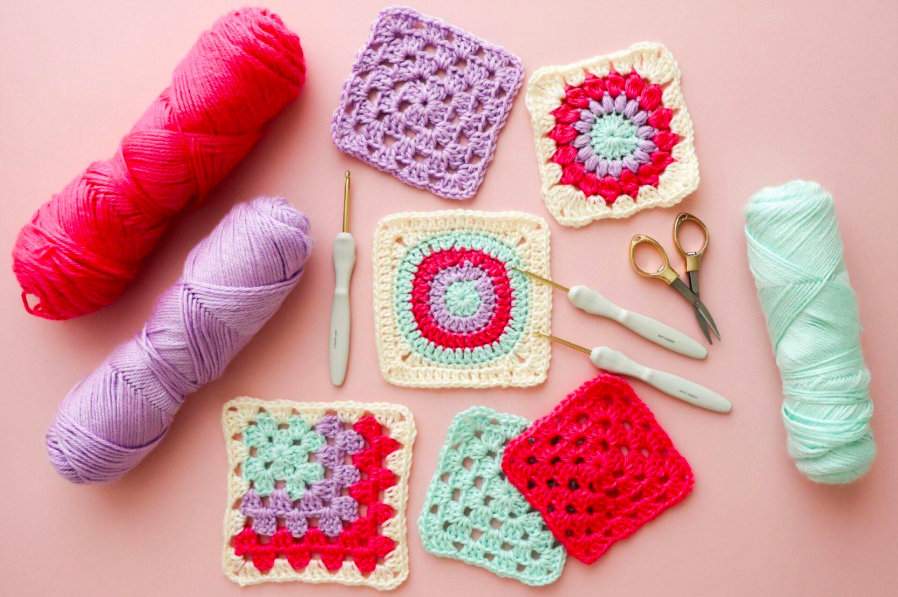
The granny square is one of the most recognizable patterns in all of crochet, and it’s not hard to see why. Those stacked clusters of stitches, bordered by crisp chain spaces, show up on blankets, bags, pillows, and sweaters across generations of crochet projects. Despite its reputation as a classic, the granny square is surprisingly approachable for beginners once you break it down round by round.
This guide walks through exactly how to make a traditional granny square, from your first slip knot to weaving in the final end. Along the way, you’ll pick up techniques that apply to nearly every crochet project you tackle afterward, including working in rounds, joining colors, and reading basic stitch patterns. If you’ve already practiced single and double crochet on a project like a dishcloth or coaster, you’re ready for this.
By the end, you’ll have a finished square in hand and the know-how to make as many more as you’d like. String a handful together, and you’re well on your way to a blanket, tote bag, or cushion cover.
What you’ll need
Before you start, gather your supplies:
A crochet hook: Size H/8 (5mm) works well with worsted-weight yarn and offers an easy grip for beginners.
Worsted-weight yarn in multiple colors: Traditional granny squares use three or four colors, with one color often reserved for the final round. Pick colors with enough contrast that you can clearly see where one round ends and the next begins.
Scissors and a yarn needle: You’ll need both for finishing and weaving in ends.
Stitch markers: Optional, but helpful for keeping track of your rounds while you’re still building confidence with the pattern.
Stitches and abbreviations you’ll use
Granny squares rely on just a few basic stitches, repeated in a specific sequence:
- Chain stitch (ch): The foundation stitch used to start your square and to create the spaces between stitch clusters.
- Slip stitch (sl st): Used to join rounds together.
- Double crochet (dc): The main stitch that forms the clusters, or “shells,” of the granny square pattern.
That’s it. If you can chain, slip stitch, and double crochet, you have everything you need to complete this project.
Step 1: Make a slip knot and foundation ring
Start by making a slip knot and placing it on your hook. Chain 4 stitches, then join the chain into a ring by inserting your hook into the first chain you made and working a slip stitch. You should now have a small loop of yarn, which will serve as the center of your square.
This ring is what every round of your granny square will be worked into, so it’s worth taking a moment to make sure it’s neither too tight nor too loose. If it’s too tight, you’ll struggle to fit your hook through for the next round. Too loose, and the center of your finished square may look sloppy.
Step 2: Work the first round
Chain 3. This chain counts as your first double crochet stitch, so don’t skip it. Next, work 2 more double crochet stitches into the center of the ring, so you have 3 double crochet stitches total (including the starting chain).
Chain 2, then work another set of 3 double crochet stitches into the ring. Repeat this process two more times, so you end up with 4 clusters of 3 double crochet stitches, each separated by a chain-2 space.
To finish the round, join to the top of your starting chain-3 with a slip stitch. You’ve now completed round one, and your square should have four small corners forming.
Step 3: Work the second round
If you’re changing colors, now is a natural point to do it. To switch colors, work your last slip stitch of the previous round with the new color, then continue.
Begin the new round by making a slip stitch into the next chain-2 space from the previous round. Chain 3 (again counting as your first double crochet), then work 2 more double crochet stitches into that same space, so you have a 3-double-crochet cluster.
Chain 1, then work another cluster of 3 double crochet stitches into the same chain-2 space. This creates the corner shape your granny square is known for.
Chain 1 again, then move to the next chain-2 space from the previous round and work another 3-double-crochet cluster. Chain 1, and repeat the process at each corner space around the square.
When you reach the end of the round, join with a slip stitch to the top of your starting chain-3.
Step 4: Work the third round (and beyond)
Each additional round follows the same basic logic as round two, just with more spaces to work into as the square grows.
At each corner (where you have a chain-2 space from the very first round, or two clusters separated by a chain-1 space in later rounds), work a cluster of 3 double crochet stitches, chain 2, then another cluster of 3 double crochet stitches. Along the sides, work a single cluster of 3 double crochet stitches into each chain-1 space, with a chain-1 between each cluster.
Continue adding rounds until your square reaches your desired size. Most granny square patterns call for 4 to 6 rounds, though there’s no strict rule. Larger squares require fewer squares to complete a blanket, while smaller squares give you more flexibility in color placement and pattern arrangement.
Step 5: Finish and weave in ends
Once your square reaches the size you want, finish your final round with a slip stitch to join, then cut your yarn leaving a 6-inch tail. Pull the tail through the last loop to secure it.
Use your yarn needle to weave each loose end through the back of nearby stitches, running it in different directions to help it stay secure through washing and handling. Trim any excess yarn close to the fabric once the ends are woven in.
Common mistakes to avoid
Miscounting your starting chain-3. It’s easy to forget that the initial chain-3 at the start of each round counts as a stitch. Skipping it, or accidentally adding an extra double crochet on top of it, will throw off your stitch count for the whole round.
Losing track of corners. Because corners have a chain-2 space while the sides have chain-1 spaces, it’s easy to mix them up, especially in your first few squares. If your square starts looking lopsided, it’s worth stopping to double-check that your corners have the wider spacing.
Pulling too tight when joining. Slip stitches used to join rounds can easily end up tighter than the rest of your work if you’re not paying attention. A tight join can pucker the fabric and make it harder to work into on the next round.
Forgetting to count rounds. Especially if you’re making multiple squares for a blanket, it’s easy to lose track of how many rounds you’ve completed. Using a stitch marker or simply jotting down a tally as you go can save you from unraveling a square to check.
What to make once you’ve mastered the granny square
A single granny square is satisfying on its own as a coaster or small decoration, but the real versatility comes from making multiples. Join several squares together with single crochet or a simple whip stitch, and you’ve got the makings of a blanket, a pillow cover, or even a simple bag.
Granny squares are also a great canvas for experimenting with color. Try working each round in a different shade, or stick to two alternating colors for a bold, graphic look. Because the technique stays the same regardless of color choice, this is a low-risk way to practice color combinations before committing to a larger project.
Keep practicing, one square at a time
The granny square might look intricate, but it’s really just the same sequence of stitches repeated with growing spaces between them. Once you’ve made your first one, the second comes together noticeably faster, and by your fifth or sixth, you’ll likely be able to work through a round without checking the pattern at all.
If your first square doesn’t turn out perfectly symmetrical, that’s completely normal. Pull it out and try again, or simply keep it as a reminder of how far your stitches have come by the time you finish your tenth. Pick up your hook, chain your foundation ring, and get started on your first round today.
Frequently asked questions
How many rounds does a standard granny square have?
Most granny squares range from 4 to 6 rounds, though there’s no fixed rule. The number of rounds simply determines the final size of your square.
Do I need to use multiple colors for a granny square?
No. While multicolor granny squares are a classic look, you can work the entire square in a single color for a more subtle, textured effect.
Why does my granny square look wavy or ruffled instead of flat?
A wavy square usually means you’ve added too many stitches in a round, often by working extra double crochet stitches into the corner spaces. Double-check your stitch count against the pattern at the end of each round to catch this early.
Can I use granny squares to make a blanket?
Yes. Granny squares are one of the most popular ways to make a blanket, since you can work on individual squares in small sessions and join them together once you have enough.