Free Daisy Granny Square Crochet Tote Bag Pattern for Beginners
STEP-BY-STEP CROCHET TUTORIAL • BEGINNER FRIENDLY • US CROCHET TERMS
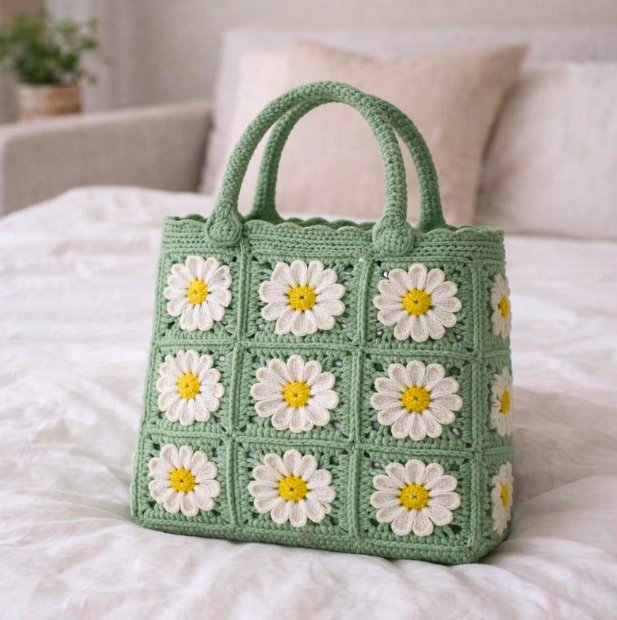
A handmade crochet tote bag is a wonderful way to combine creativity, color, and everyday practicality. This free daisy granny square crochet tote bag pattern features cheerful mustard-yellow flower centers, soft cream petals, and sage green borders. The result is a charming floral bag that’s perfect for spring, summer, handmade gifts, or carrying your daily essentials.
In this tutorial, you’ll learn how to crochet the daisy squares, join them into a bag, create a sturdy base, add a neat top border, and make comfortable handles. The pattern uses basic crochet techniques and includes stitch counts and assembly guidance to help beginners follow along.

Finished daisy granny square tote bag — a floral handmade accessory in cream, sage green, and mustard yellow.
Crochet bag pattern overview
Skill level
Confident beginner
Crochet hook
5.0 mm (H/8)
Yarn weight
Worsted / Category 4
Squares required
12 daisy squares
Construction
2 panels + side/base strip
Terminology
US crochet terms
Materials you’ll need

For this project, choose worsted-weight cotton yarn in three complementary colors. Cotton is a useful choice for bags because it creates a relatively firm fabric and tends to hold its shape better than very stretchy fibers.
- Cream yarn: approximately 250–300 yards for petals, seams, borders, and handles
- Sage green yarn: approximately 200–250 yards for the square backgrounds and optional side/base strip
- Mustard yellow yarn: approximately 50–75 yards for the flower centers
- 5.0 mm crochet hook
- Scissors, yarn needle, measuring tape, and stitch markers
These quantities include an allowance for swatching and finishing. Your actual yarn use will depend on your tension and final measurements.
Finished measurements and gauge

At the target gauge, each completed granny square measures approximately 4 inches (10 cm) across after gentle blocking.
The bag uses six squares for the front panel and six for the back, arranged three squares across and two squares high. A separate crocheted strip forms the sides and bottom.
The approximate finished measurements are:
| Measurement | Size |
|---|---|
| Width | 12 in (30 cm) |
| Height | 8–9 in (20–23 cm), excluding handles |
| Depth | 3–4 in (7.5–10 cm) |
| Each handle length | 20 in (51 cm) |
| Handle width | 1.5 in (3.8 cm) |
The size can vary after joining, edging, and blocking. Measure your completed squares before making the side/base strip.
Crochet abbreviations
| Abbreviation | Meaning |
|---|---|
| ch | Chain |
| sc | Single crochet |
| hdc | Half double crochet |
| dc | Double crochet |
| sl st | Slip stitch |
| st | Stitch |
| sp | Space |
| MR | Magic ring |
| FO | Fasten off |
The beginning chain 3 counts as a double crochet in Round 1 only. In later rounds, the beginning chain 1 does not count as a stitch.
Step 1: Crochet the daisy flower center

Begin with mustard yellow yarn and make a magic ring.
Round 1: Chain 3 (counts as the first dc). Work 11 dc into the magic ring. Pull the ring closed and join with a slip stitch to the top of the beginning chain 3. (12 dc)
Fasten off the mustard yarn and weave in the tail.
You should now have a small, flat yellow circle. This will form the center of your daisy.
If you find magic rings difficult, you can instead chain 4, join into a ring, and work the 12 double crochet stitches into the center opening.
Step 2: Add the cream daisy petals

Join the cream yarn to any stitch of the yellow center.
Round 2: Chain 1. Work one petal into each of the 12 stitches from Round 1.
To make one petal, yarn over, insert your hook into the stitch, yarn over, and pull up a loop. Repeat this yarn-over-and-pull-up action two more times in the same stitch. You should have seven loops on your hook. Yarn over and pull through all seven loops, then chain 1 to secure the petal.
Repeat around the center, making 12 petals in total. Join with a slip stitch to the top of the first petal. Fasten off.
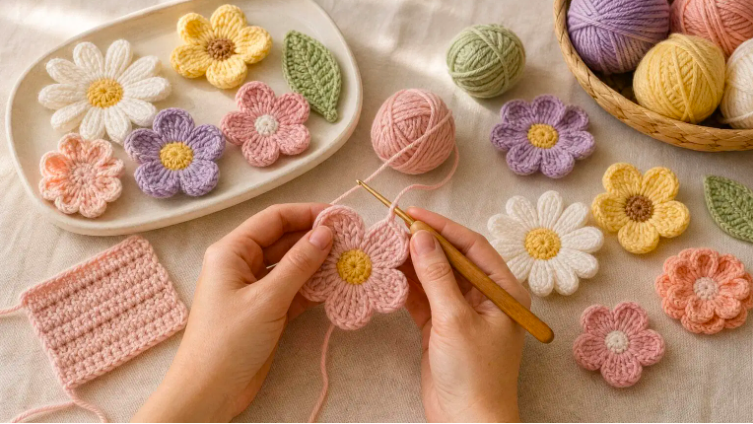
Your daisy should have a yellow center surrounded by 12 raised cream petals.
Keep your tension fairly even so that the petals are similar in height and fullness.
Step 3: Turn the daisy into a granny square

Now you’ll create the square background using sage green yarn.
Because the petals are raised, work into the chain-1 spaces between the petals rather than into the tops of the puff stitches.
Round 3: Join sage green yarn in any chain-1 space between petals. Chain 1, then work (2 dc, ch 2, 2 dc) in the same space to make the first corner. Work 2 dc in each of the next two chain-1 spaces. Repeat this sequence around: (2 dc, ch 2, 2 dc) in the next space, followed by 2 dc in each of the next two spaces. Complete four corners in total. Join with a slip stitch to the first dc.
You should have four corner spaces and 12 dc along each side, counting the corner stitches.
Round 4: Chain 1. Work 1 dc in each stitch along the sides. At each corner chain-2 space, work (2 dc, ch 2, 2 dc). Continue around all four sides and join with a slip stitch to the first dc.
You should have 16 dc per side, counting the stitches worked into the corners, and four corner chain-2 spaces.
Fasten off and weave in your ends.
If your square is smaller than 4 inches, you can adjust your hook size or add another round of double crochet using the same corner treatment. Make sure every square receives the same number of rounds.
Step 4: Make 12 matching daisy squares

Repeat Steps 1–3 until you have 12 completed daisy granny squares.
Try to maintain consistent tension throughout the project. If some squares are noticeably larger than others, the finished panels may look uneven or twist when joined.
Once all 12 squares are complete, gently block them to the same dimensions. For cotton yarn, lightly dampen each square, pin it into shape on a suitable blocking mat, and let it dry completely.
Blocking helps define the corners, straighten the edges, and make the joining process easier.
Step 5: Join the front and back panels

Divide the 12 squares into two groups of six.
For each panel, arrange three squares across the top row and three squares across the bottom row.
Use cream yarn to join the squares. You can use a slip-stitch join or whip stitch, depending on your preferred finish.
For a slip-stitch join, place two squares with their wrong sides together, align the stitches, and work slip stitches through the corresponding edge loops. Continue until the two squares are joined.
First join the squares horizontally into two rows of three. Then join the two rows together.
Repeat for the second panel.
You should now have two rectangular floral panels, each measuring approximately 12 inches wide and 8 inches high before additional edging.
Step 6: Crochet the side and bottom strip

A separate side-and-bottom strip gives the bag more depth than a flat tote.
Using sage green yarn, chain enough stitches to create a strip approximately 3–4 inches wide. For example, chain 13 and work 12 single crochet stitches across if your single-crochet gauge produces the desired width.
Row 1: Work 1 sc in the second chain from the hook and in each chain across. Ch 1 and turn. (12 sc)
Row 2: Work 1 sc in every stitch across. Ch 1 and turn. (12 sc)
Remaining rows: Repeat Row 2 until the strip is long enough to run down one side of the front panel, across its bottom, and up the other side.
For a panel approximately 8 inches tall and 12 inches wide, the required strip length will be about 28 inches before seam adjustments.
Do not rely on a fixed row count here. Measure the strip against the actual panel edges and stop when the lengths match.
Fasten off, leaving a long tail for sewing.
Step 7: Assemble the bag

Lay the front panel flat with the right side facing upward.
Align the side/base strip along one side, the bottom, and the opposite side. Pin or mark the corners so the strip stays evenly positioned.
Sew the strip to the front panel using a whip stitch or mattress stitch.
Next, align the back panel with the remaining long edge of the strip and sew it into place.
Work carefully around the bottom corners to avoid puckering. You may need to ease the fabric slightly so the strip lies smoothly.
Once the seams are secure, turn the bag right side out and check its shape.
The tote should now have a front, back, two sides, and a flat bottom.
Step 8: Crochet a neat top border

A neat top border helps strengthen the bag opening and gives the finished tote a polished appearance.
Join cream yarn at one side seam along the top opening.
Round 1: Chain 1 and work single crochet stitches evenly around the entire top opening. Place one sc into each available top-edge stitch, adjusting the spacing around the side-strip edges to keep the border flat. Join with a slip stitch to the first sc.
Round 2: Chain 1 and work 1 sc in every stitch around. Join with a slip stitch.
Fasten off and weave in the ends.
The exact stitch count depends on the number of stitches around your assembled panels and side strip. Count your first round and maintain that number in Round 2.
Step 9: Crochet two sturdy handles

Use cream cotton yarn and a 5.0 mm hook.
Row 1: Chain 7. Work 1 sc in the second chain from the hook and in each chain across. Ch 1 and turn. (6 sc)
Row 2: Work 1 sc in each stitch across. Ch 1 and turn. (6 sc)
Rows 3 onward: Repeat Row 2 until the handle measures approximately 20 inches long.
Fasten off, leaving a long tail.
Make a second handle using the same instructions. Measure both handles and adjust them so they are equal in length.
For additional strength, you can crochet the straps with a slightly smaller hook or reinforce them with cotton webbing.
Step 10: Attach the handles and finish

Place one handle on the front panel, positioning its ends symmetrically near the upper corners. Keep the ends approximately 2–3 inches inward from the outer edges.
Overlap each strap end with the bag by approximately 1.5 inches.
Sew the ends securely using a yarn needle and matching yarn. Stitch around each attachment area in a rectangle, then add diagonal stitches to form an X for reinforcement.
Repeat with the second handle on the back panel.
Weave in all remaining yarn tails, check the seams, and gently reshape the bag.
Your handmade daisy granny square tote is complete!
Creative ways to customize your daisy crochet tote bag

The beauty of a granny square crochet bag is that you can create completely different looks using the same basic construction.
For a soft cottagecore style, try dusty pink squares with cream petals and golden flower centers. For a more earthy look, combine terracotta, olive green, and warm beige. You can even use a different background color for each square to create a cheerful patchwork design.
If you prefer a larger bag, make additional granny squares and rearrange the panels. Just remember to adjust the side/base strip and yarn quantities accordingly.
You can also add a fabric lining for extra strength. A lining is especially helpful if you plan to carry keys, pens, or other small items that could slip through the crochet openings.
Beginner tips for making a beautiful crochet bag
The most important tip is to focus on consistency rather than speed. Making twelve matching squares is easier when you use the same hook, yarn weight, and stitch tension throughout the project.
Count the petals on every flower before beginning the green border. A missed petal or an extra stitch can affect the symmetry of the square.
It also helps to weave in yarn ends as you complete each square. Leaving every loose end until the final assembly can make the finishing process feel unnecessarily time-consuming.
Finally, check the bag handles before using your finished tote. Crochet straps can stretch under weight, and reinforced attachments will help improve durability.
How to wash and care for your crochet tote

To keep your crochet tote looking its best, follow the washing instructions for your chosen yarn.
Hand washing in cool water with a mild detergent is generally a gentle option for cotton crochet projects. Avoid harsh scrubbing or twisting the bag, especially around the flower petals and seams.
After washing, press out excess moisture with a clean towel and reshape the bag. Let it dry flat rather than hanging it by the handles, which may cause stretching.
Store your bag in a dry place when it is not in use.
Frequently asked questions
Is a daisy granny square tote bag suitable for beginners?
Yes, especially for confident beginners who already know basic crochet stitches. The flower petals and square shaping require a little practice, but the repetitive construction makes it easier as you progress.
How many granny squares do I need for this tote bag?
This version uses 12 squares: six for the front and six for the back. A separate crocheted strip forms the sides and bottom.
What yarn works best for crochet bags?
Worsted-weight cotton is a practical choice because it offers good stitch definition and a relatively sturdy fabric. However, the strength of the finished bag also depends on the stitch tension, seams, and handle construction.
Can I make the bag bigger?
Yes. You can increase the number of squares, use larger squares, or add extra rounds to each granny square. Adjust the connecting strip and handles to match your new dimensions.
Should I line my crochet bag?
A lining is optional, but it can help prevent smaller items from falling through the stitches and provide extra support for everyday use.
Final thoughts
This daisy granny square crochet tote bag is a creative project that combines colorful flowers with a practical handmade accessory. From the cheerful mustard centers to the soft cream petals and sage green borders, every detail contributes to its charming appearance.
Once you’ve learned the basic daisy square, you can use the same motif for matching accessories, pillow covers, blankets, or other crochet projects.
Take your time, enjoy the process, and make the design your own.