Crochet Christmas Tree Spiral Ornament Tutorial: Easy DIY Christmas Decoration for Beginners
An original, beginner-friendly crochet pattern with a curly Christmas tree shape, a tiny star topper, and a hanging loop.
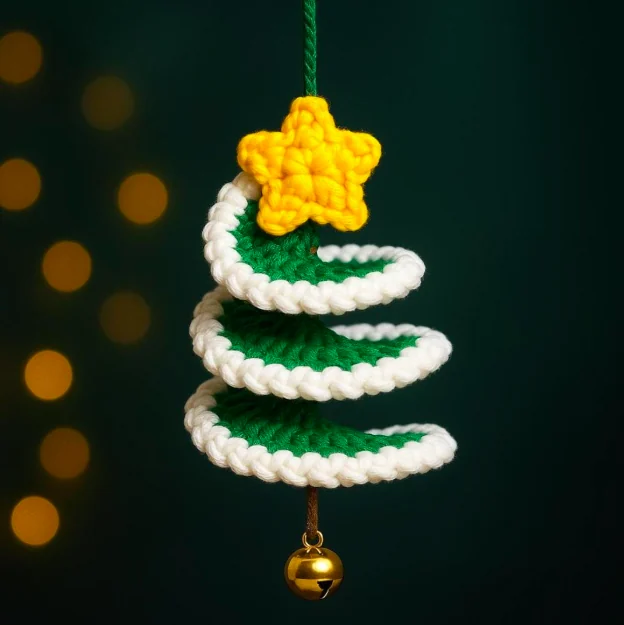
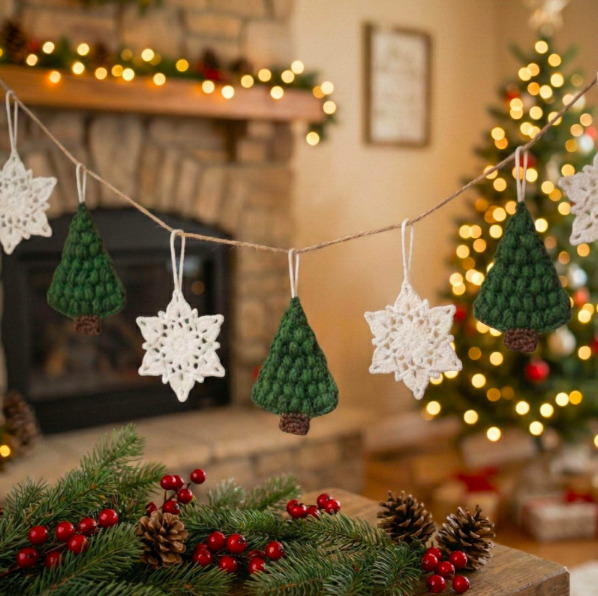
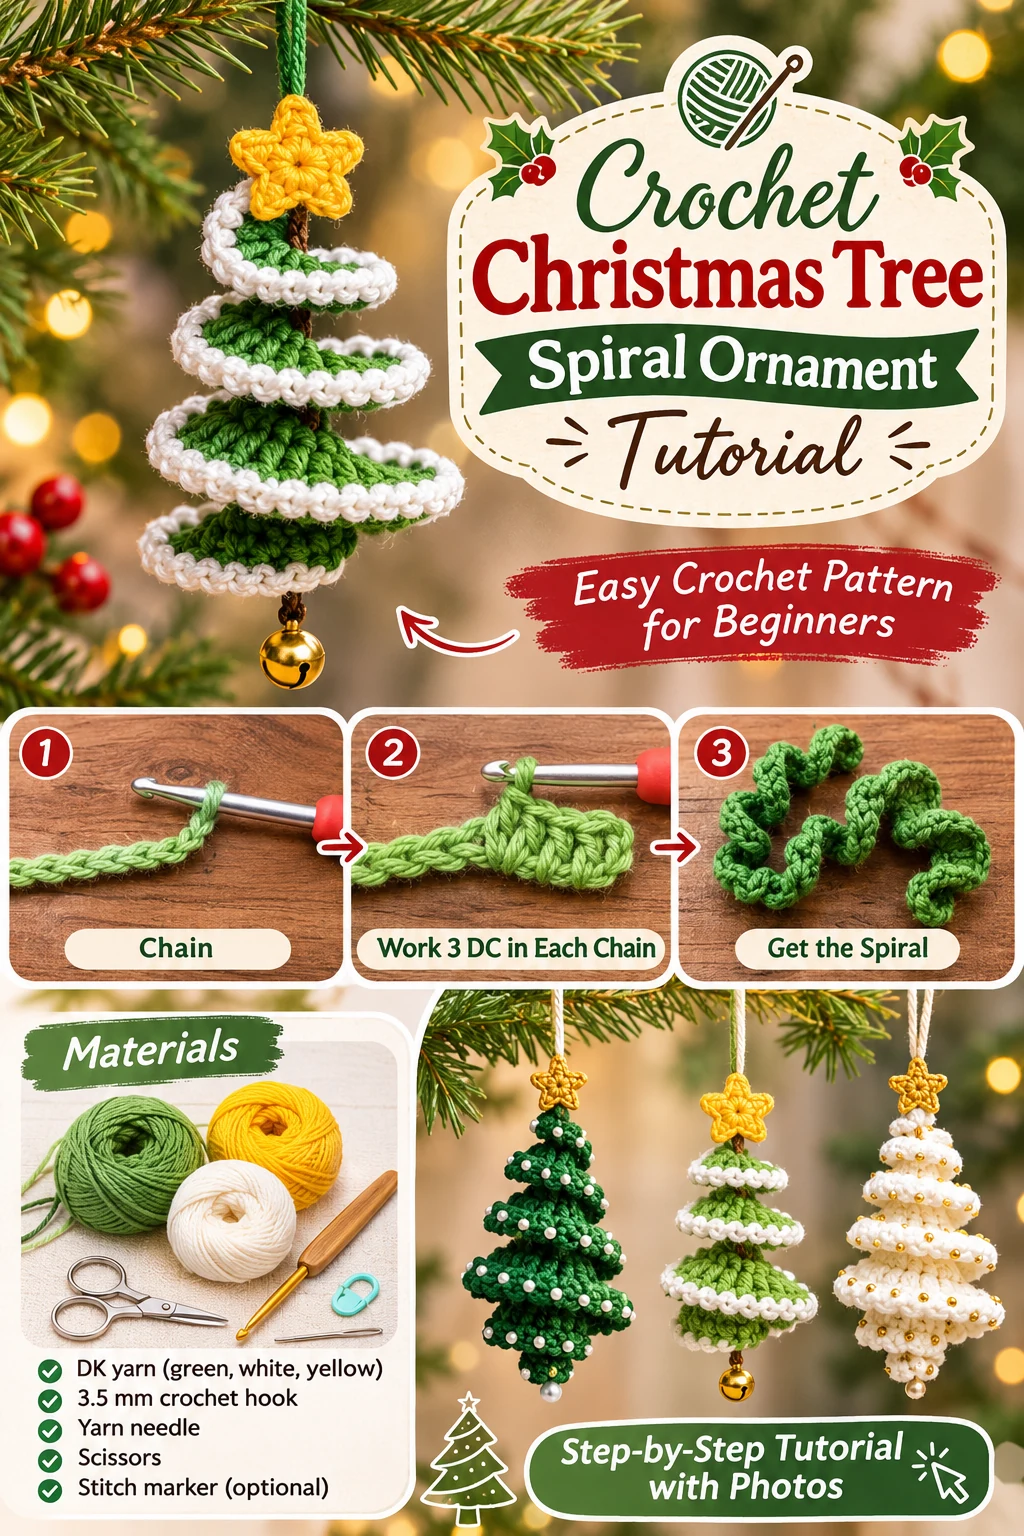
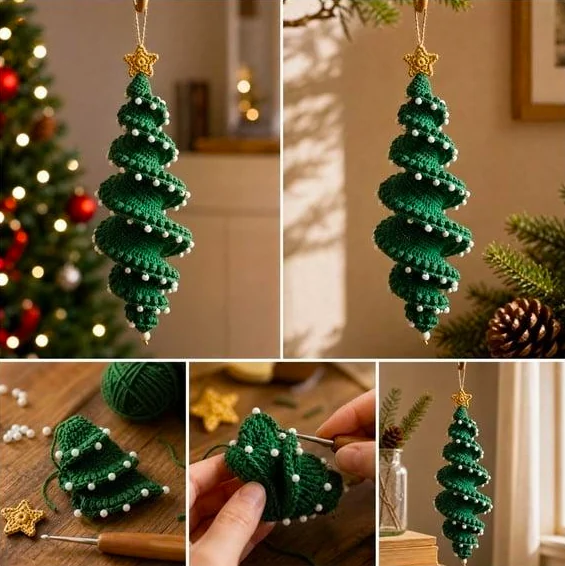
AI-generated visual illustration of the spiral Christmas tree ornament concept. The written pattern below is an original design and has not been physically tested.
There is something special about decorating your Christmas tree with ornaments you have made yourself. A little yarn, a crochet hook, and a quiet afternoon can turn into a handmade decoration you will want to bring out every December.
This crochet Christmas tree spiral ornament tutorial shows you how to create a charming miniature Christmas tree using a simple crocheted strip that naturally curls into a spiral. Add a tiny star, a hanging loop, and a few optional decorations, and you have a festive ornament that looks lovely on a Christmas tree, wrapped present, or holiday garland.
The best part? You don’t need complicated shaping, advanced stitches, or lots of yarn. The main tree uses basic chains and double crochet stitches, making this a manageable project for confident beginners who want to try something a little different.
In this tutorial, you’ll learn how to crochet the spiral, shape it into a Christmas tree, make a small star topper, assemble the ornament, and customise it with your favourite Christmas colours.
Why You’ll Love This Crochet Christmas Tree Ornament
This handmade crochet Christmas decoration is small, lightweight, and easy to personalise. The curled design gives the ornament a playful three-dimensional appearance without requiring you to crochet a stuffed tree.
Here’s what makes this project worth trying:
- Beginner-friendly stitches: The main spiral uses chains and double crochet stitches.
- Quick construction: Only one main row is needed for the curled tree strip.
- Scrap-yarn friendly: A small amount of leftover green yarn is enough.
- Easy to customise: Change the yarn, star colour, ribbon, or decorations.
- Versatile: Use the finished tree as an ornament, gift topper, or festive garland decoration.
- No stuffing required: The spiral creates its own decorative shape.
Because each tree is made from a flexible crocheted strip, you can also adjust the spacing between the curls to give your ornament a fuller or more open appearance.
Crochet Christmas Tree Spiral Ornament Pattern at a Glance
Skill level
Confident beginner
Estimated time
30–60 minutes
Terminology
US crochet terms
Hook size
3.5 mm (E/4)
Yarn weight
DK / Light (3)
Construction
Curled strip, folded and secured
Approximate finished size: 4–5 inches (10–13 cm) tall, excluding the hanging loop, and about 2.5–3 inches (6–7.5 cm) across at the widest point.Measurements and time are estimates, not verified sample results. Yarn, tension, and assembly spacing affect the finished dimensions.
Materials and Tools You’ll Need
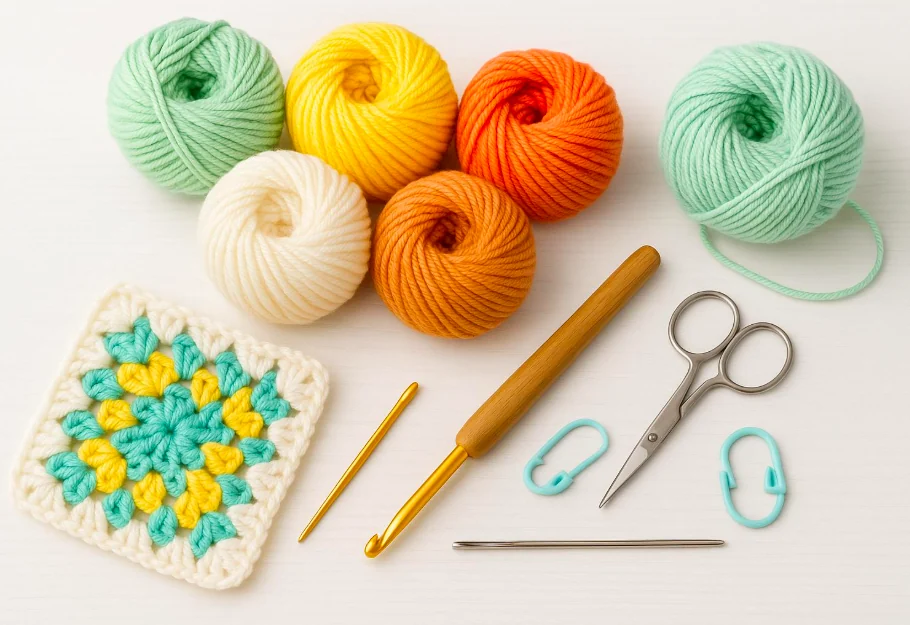
You don’t need an extensive collection of crochet supplies to make this miniature Christmas tree ornament. Most of the materials are common items you may already have in your craft basket.
Yarn
For one ornament, prepare approximately:
| Yarn colour | Approximate amount | Purpose |
|---|---|---|
| Sage or forest green | 10–15 g | Main spiral tree |
| Mustard yellow or gold | 1–2 g | Star topper |
| Cream or ivory | Small scrap | Optional accents |
| Brown | Small scrap | Optional trunk detail |
DK-weight cotton or cotton-blend yarn is a good choice because it provides stitch definition and enough structure to help the spiral hold its shape.
Acrylic DK yarn also works well, especially if you prefer a softer, slightly fuller ornament.
Tools
- 3.5 mm (E/4) crochet hook
- Yarn needle with a large eye
- Sharp craft scissors
- Stitch marker, optional
- Measuring tape
- Small amount of matching sewing thread, optional
- Ribbon or yarn for the hanging loop
- Small beads, optional
If you use beads, make sure they are securely attached. Avoid small detachable embellishments on decorations intended for babies or young children.
Choosing the Best Yarn
The yarn you choose changes the appearance of the finished crochet Christmas tree.
Cotton yarn creates crisp stitches and a well-defined spiral. It is a particularly good option for ornaments that you want to store and reuse.
Acrylic yarn produces a softer, more flexible ornament. It is usually affordable and available in many Christmas colours.
Cotton-acrylic blends offer a balance between softness and structure.
For your first attempt, choose smooth, light-coloured DK yarn rather than fuzzy novelty yarn. Being able to see your stitches clearly makes the pattern easier to follow.
Crochet Abbreviations (US Terms)
Before beginning, familiarise yourself with the stitches and abbreviations used in this pattern.
| Abbreviation | Meaning |
|---|---|
| ch | Chain |
| dc | Double crochet |
| sl st | Slip stitch |
| sc | Single crochet |
| st(s) | Stitch(es) |
| rep | Repeat |
| FO | Fasten off |
| RS | Right side |
| WS | Wrong side |
The main tree spiral uses only chains and double crochet stitches. The optional star uses single crochet and slip stitches.
How to Make a Double Crochet Stitch
If you are new to double crochet, follow these steps:
- Yarn over your crochet hook.
- Insert the hook into the indicated stitch or chain.
- Yarn over and pull up a loop. You should have three loops on your hook.
- Yarn over and pull through the first two loops.
- Yarn over again and pull through the remaining two loops.
You have completed one double crochet stitch.
For this pattern, you’ll work several double crochet stitches into the same foundation chain. Those increases are what cause the strip to curl.
Understanding How the Spiral Christmas Tree Works
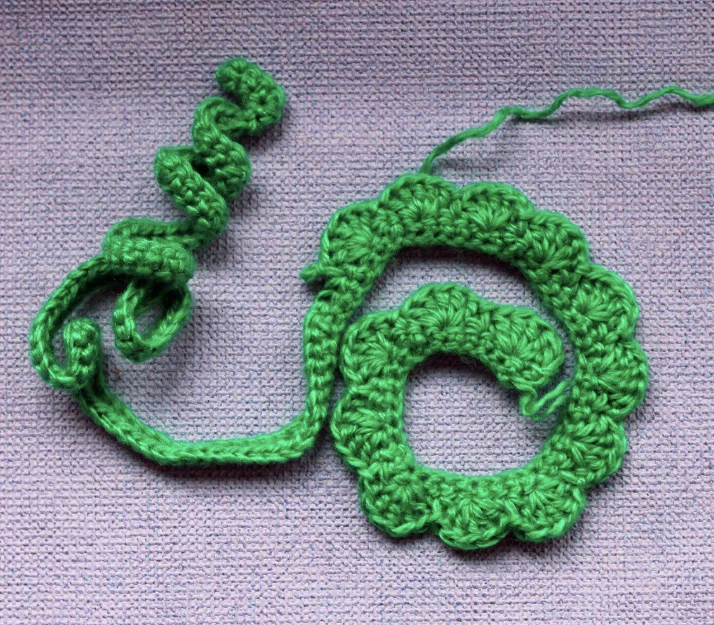
The secret to this easy crochet Christmas tree is the way the stitches are distributed.
Normally, when you crochet a flat strip, you work one stitch into each stitch or chain across the row. The resulting fabric stays relatively flat.
For this spiral, you’ll work three double crochet stitches into each foundation chain.
This creates more stitches than the foundation chain can comfortably accommodate in a flat shape. The extra fabric begins to curl and ruffle naturally.
Once the strip is complete, you can arrange its curls into a tapered Christmas tree shape. The wider section sits near the bottom, while the remaining curls become progressively smaller toward the top.
You don’t need to increase or decrease stitches in multiple rows. The entire tree body is made from one foundation chain and one row of double crochet increases.
Step-by-Step Crochet Christmas Tree Spiral Ornament Tutorial
Now comes the fun part: making your Christmas tree.
For the main ornament, use sage green DK-weight yarn and a 3.5 mm crochet hook.
Step 1: Make the Foundation Chain
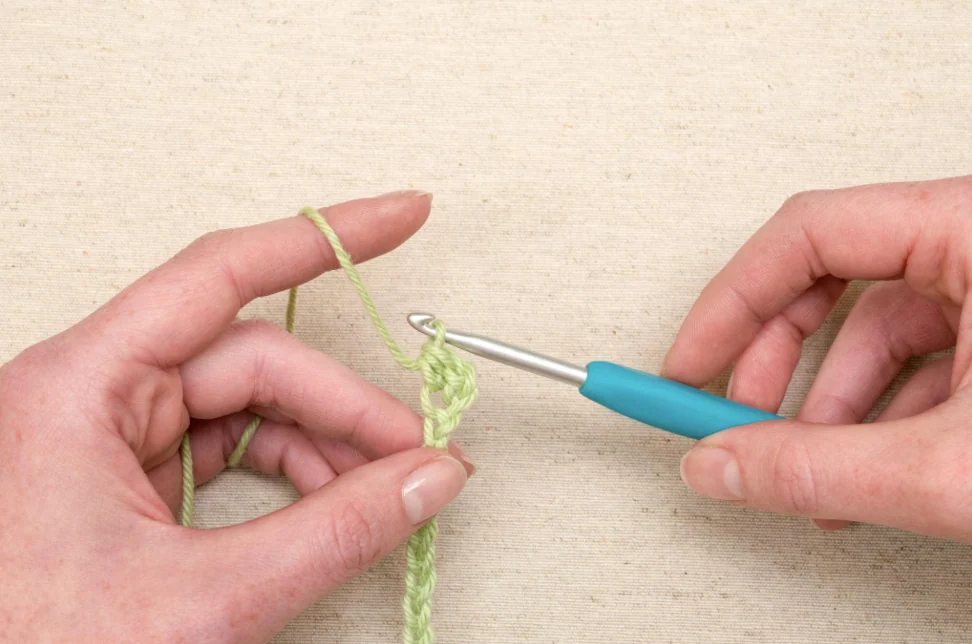
Begin with a slip knot and place it onto your crochet hook.
Foundation: Ch 51.
Keep your foundation chain relaxed rather than pulling it tightly. A loose, even chain makes it easier to work multiple stitches into each chain.
Once you have completed all 51 chains, count them carefully.
You will skip the first three chains in the next step. These skipped chains form the turning chain.
Stitch count: 51 chains.
Step 2: Crochet the First Double Crochet Group
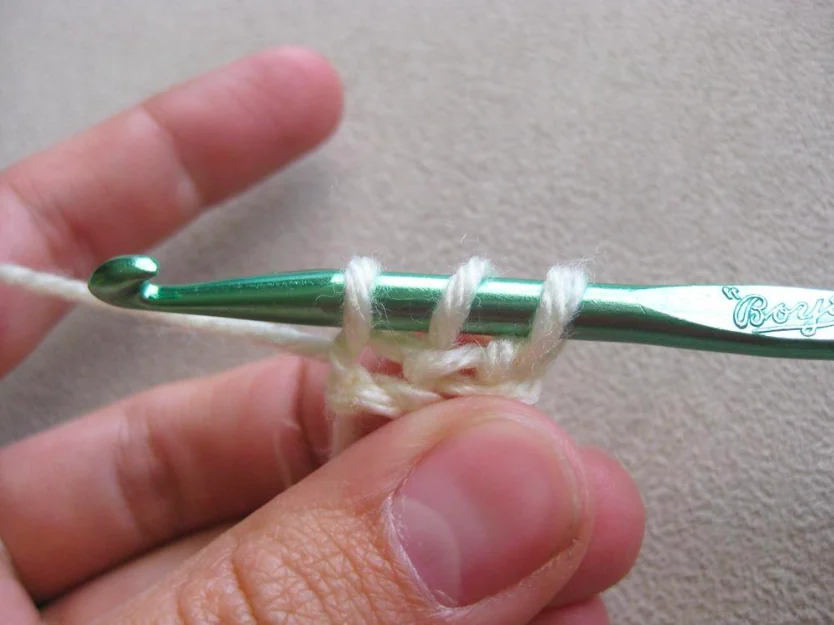
Yarn over your hook.
Count back to the fourth chain from the hook.
Work three double crochet stitches into that fourth chain.
To do this, complete your first double crochet stitch normally. Instead of moving to the next chain, insert your hook into the same chain again and make another double crochet.
Repeat once more.
You should now have three double crochet stitches grouped into the same foundation chain.
Stitch count: 3 dc worked into the fourth chain from the hook.
The skipped three chains are the turning chain and are not counted as a double crochet stitch in this pattern.
Step 3: Continue the Spiral Increases
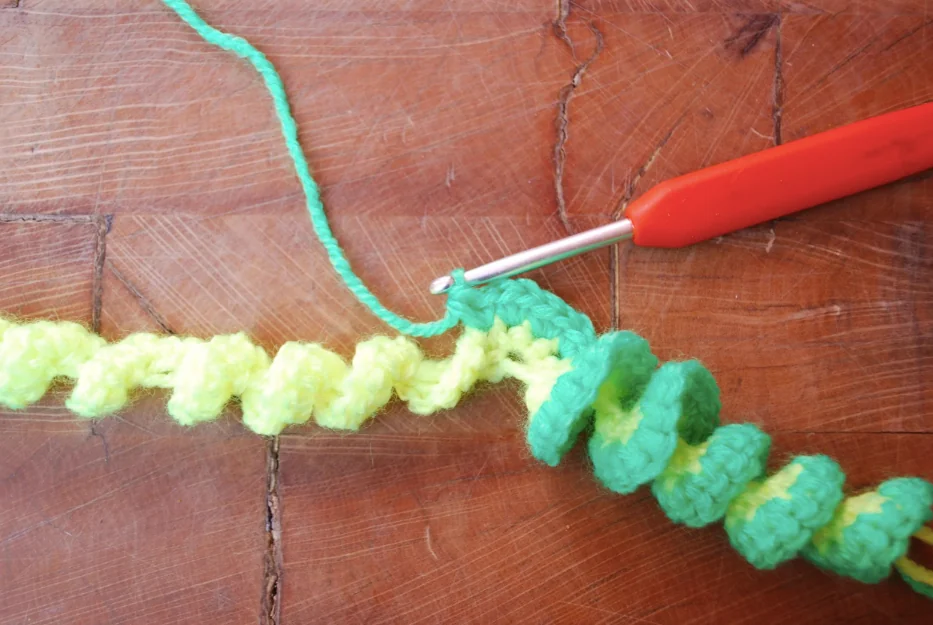
Continue across the foundation chain, working three double crochet stitches into every remaining chain.
Main spiral row:
- Work 3 dc in the fourth ch from the hook.
- Work 3 dc in each remaining ch across.
- FO, leaving a yarn tail approximately 12–16 inches (30–40 cm) long for assembly.
Because you started with 51 chains and skipped the first three, there are 48 foundation chains available for stitching.
Each of those 48 chains receives three double crochet stitches.
Total stitch count:
48 × 3 = 144 double crochet stitches
As you work, the fabric should begin curling. You may notice that the strip twists into a loose corkscrew or ruffled coil.
Don’t try to flatten it. The curling is exactly what we want.
If the strip looks irregular at first, continue crocheting. The spiral becomes more obvious as more stitches are added.
Step 4: Arrange the Curled Strip
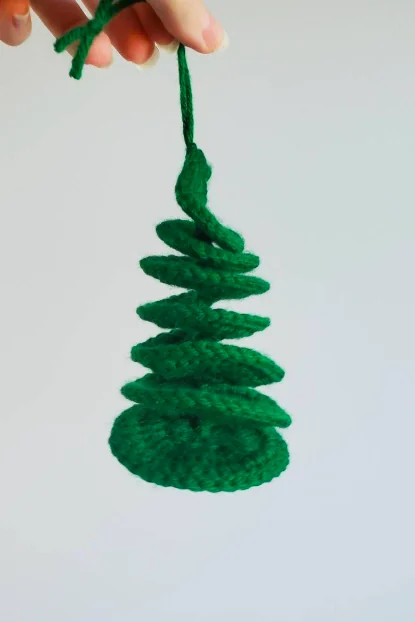
Once you have finished crocheting the strip, place it on a flat surface.
Allow the fabric to curl naturally.
Gently stretch and arrange the spiral with your fingers to distribute the ruffles evenly.
You should have a flexible, curled strip that can be folded or shaped into a miniature Christmas tree.
Start at the end with the long yarn tail. This will become the bottom section of the ornament.
Arrange the strip so the first coil forms the widest part of the tree. Continue guiding the remaining length upward, making each level slightly narrower.
You are creating a stacked, tapered silhouette rather than a flat triangle.
Step 5: Shape and Secure the Christmas Tree
This step gives your ornament its final structure.
Thread the long yarn tail onto your yarn needle.
Begin at the bottom of the tree and guide the needle through the inner edges of the curled layers.
Work gradually upward, catching the centre or inner edge of each spiral section.
Try to keep the coils evenly spaced so they form a Christmas tree shape.
Use small, discreet securing stitches between neighbouring layers.
Don’t pull the yarn too tightly. If you pull too hard, the tree will collapse into a compact bundle rather than maintaining its pretty spiral shape.
Once you reach the top, make two or three small securing stitches through the upper coils.
Knot the yarn discreetly on the back and weave in the remaining tail.
Helpful tip: Before sewing, you can temporarily hold the shape with a few small stitch markers. This makes it easier to judge the overall silhouette and adjust the spacing.
There is no fixed number of coils required because the natural curl varies with yarn, tension, and how you gather the strip. Focus on achieving a balanced shape with a wide base and narrow top.
Step 6: Crochet a Tiny Star Topper
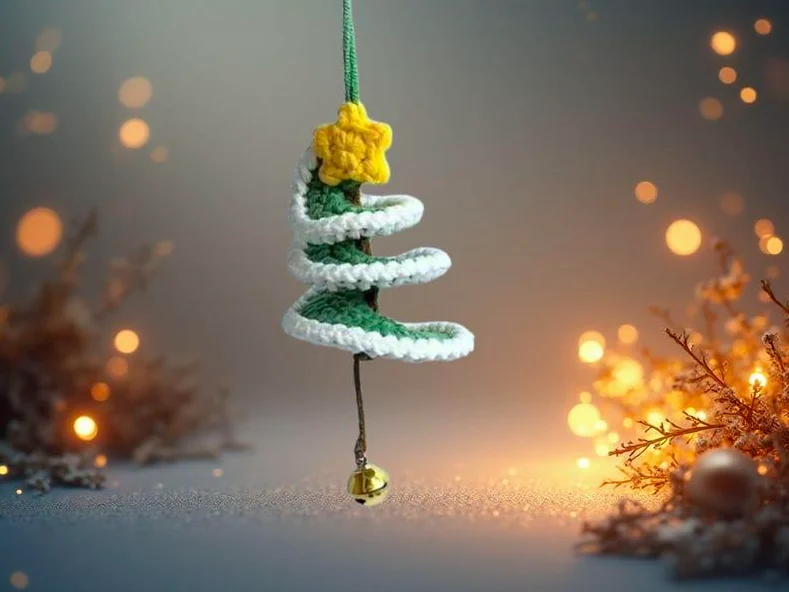
A little golden star adds a classic Christmas finishing touch.
You can crochet a small star using the same DK-weight yarn and 3.5 mm hook.
Mini Crochet Star Pattern
Using mustard yellow or gold yarn:
Round 1
- Make a magic ring.
- Work 10 sc into the ring.
- Pull the ring closed.
- Sl st into the first sc to join.
Stitch count: 10 sc.
Round 2
Repeat the following sequence five times:
- Ch 3.
- Sl st in the second ch from the hook.
- Sc in the next ch.
- Sl st into the next stitch of Round 1.
- Sl st into the following stitch of Round 1.
After five repeats, you will have worked across all 10 stitches of Round 1.
Finished count: 5 star points.
FO, leaving a 6–8 inch (15–20 cm) yarn tail for attaching the star.
Gently shape each point with your fingers.
Attaching the Star
Place the star at the top of your spiral Christmas tree.
Thread the star’s yarn tail through your needle and sew it securely to the uppermost spiral coil.
Make several small stitches through the back of the star and the top of the tree.
Check that the star sits upright before fastening off.
Weave the remaining yarn tail into the back of the ornament.
Step 7: Add the Hanging Loop
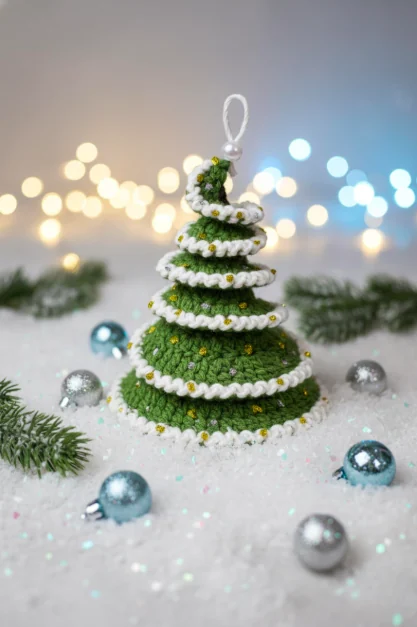
Your ornament needs a small loop so it can hang from a Christmas tree branch.
There are two simple options.
Option A: Crochet a Yarn Loop
Cut a length of matching yarn approximately 10–12 inches (25–30 cm) long.
Fold it in half.
Thread the folded end through the top of the ornament, just behind the star.
Tie the loose ends together securely at the back, leaving a loop approximately 2–3 inches (5–7.5 cm) long.
Weave the ends into the ornament.
Option B: Add a Ribbon Loop
Cut a narrow cream, red, or gold ribbon approximately 8–10 inches (20–25 cm) long.
Fold it in half and stitch the ends to the back of the ornament.
A ribbon loop adds a delicate decorative touch and looks especially pretty on handmade gifts.
Before hanging the ornament, gently lift it by the loop to make sure the attachment is secure and the tree hangs in the direction you want.
Step 8: Add Optional Christmas Decorations
Your crochet spiral Christmas tree is complete once the star and hanging loop are attached, but you can decorate it further.
For a traditional Christmas appearance, add tiny red or gold beads.
For a softer Scandinavian-inspired design, use cream yarn to embroider small dots across the green spiral.
You could also sew tiny yarn bows onto the tree or add a small felt star instead of the crocheted topper.
Keep decorations lightweight. Heavy beads can pull the spiral out of shape.
If the ornament will be used around young children or pets, embroidered details are a safer choice than detachable beads.
Finished Crochet Christmas Tree Spiral Ornament
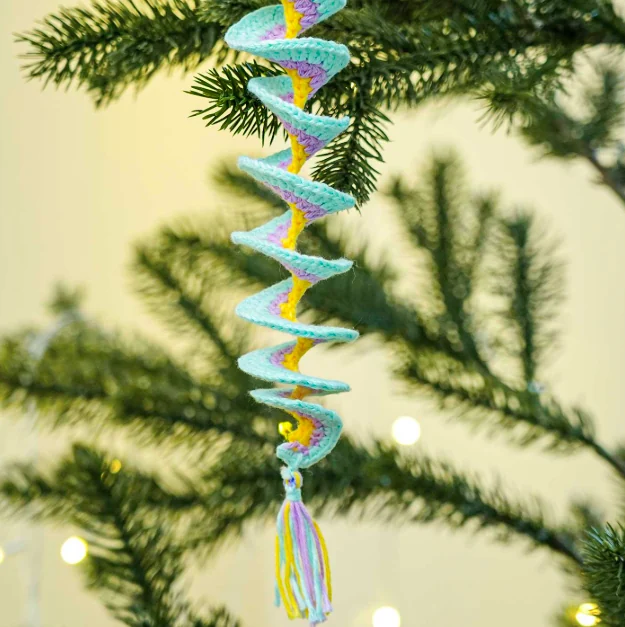
Your handmade crochet Christmas tree spiral ornament is ready to display.
The finished tree should have a soft, curly silhouette, a narrow top, and a wider bottom. The small star creates a cheerful focal point, while the hanging loop makes it easy to display.
The appearance will depend on how tightly you crocheted the strip and how closely you gathered the spiral during assembly.
If you prefer a more open design, loosen the spacing between the coils. If you want a fuller, denser tree, bring the layers slightly closer together.
Neither approach is wrong. This is one of the most enjoyable parts of working with a flexible spiral pattern.
Crochet Christmas Tree Spiral Ornament Pattern Summary
For readers who prefer a compact version to keep beside their yarn, here is the complete pattern at a glance.
Quick Reference Pattern
Main tree — Green yarn
Foundation: Ch 51.
Row 1: Work 3 dc in the fourth ch from the hook, then 3 dc in each remaining ch across. (144 dc)
FO, leaving a long tail. Shape the curled strip into a tapered tree and sew the inner edges together.
Star — Gold yarn
Round 1: 10 sc in magic ring, join. (10 sc)
Round 2: Ch 3, sl st in second ch from hook, sc in next ch, sl st in next sc of Round 1, sl st in following sc of Round 1. Rep 5 times. (5 points)
FO and sew to tree top.
Finishing
Attach a yarn or ribbon hanging loop, weave in all ends, and add optional embellishments.
Colour Variations for Your Crochet Christmas Tree
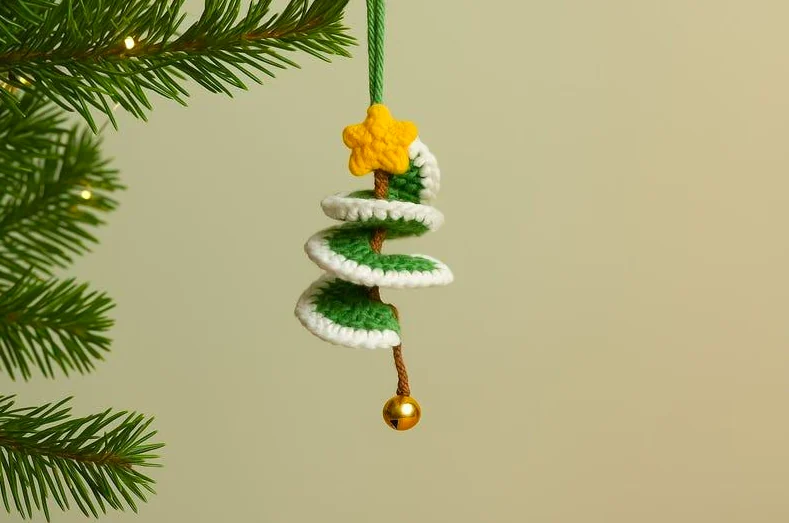
One of the easiest ways to personalise this crochet Christmas tree ornament is to change the yarn colours.
1. Traditional Christmas Green
Use deep forest green yarn with a bright golden star. Add tiny red embroidered dots to resemble Christmas baubles.
This combination looks especially festive on a traditional Christmas tree decorated with red ribbons and warm lights.
2. Soft Sage and Cream
Choose muted sage green yarn with a cream-coloured star.
This gentle palette works beautifully with wooden decorations, linen ribbons, and neutral Christmas décor.
3. Snowy White Christmas Tree
Crochet the entire spiral using ivory or white yarn.
Add a pale gold star and a silver ribbon.
The finished ornament resembles a little snow-covered Christmas tree and looks lovely against dark evergreen branches.
4. Pastel Pink Christmas Tree
Try dusty pink yarn with a cream star.
This is a fun option for pastel-themed Christmas decorations, nursery décor, or handmade gift packaging.
5. Rustic Woodland Christmas Tree
Use olive green or moss green yarn with a mustard yellow star.
Pair the ornament with wooden beads, natural twine, and kraft-paper wrapping for a rustic woodland feel.
How to Make Different Sizes
You can adapt the spiral Christmas tree pattern by changing the number of foundation chains.
The basic rule stays the same: work three double crochet stitches into each available foundation chain.
| Tree version | Foundation | Double crochet count |
|---|---|---|
| Mini | Ch 36 | 99 dc |
| Standard | Ch 51 | 144 dc |
| Large | Ch 66 | 189 dc |
| Extra large | Ch 81 | 234 dc |
For each size, skip the first three chains and work three double crochet stitches into every remaining chain.
For example, the mini version begins with 36 chains. After skipping three, you have 33 chains available.
33 × 3 = 99 double crochet stitches.
The larger versions will use more yarn and create longer spiral strips. You may need additional securing stitches to maintain the finished shape.
These sizes are pattern variations, not physically verified measurements. Adjust the coil spacing and hanging loop to suit the finished ornament.
Creative Ways to Use Crochet Spiral Christmas Trees
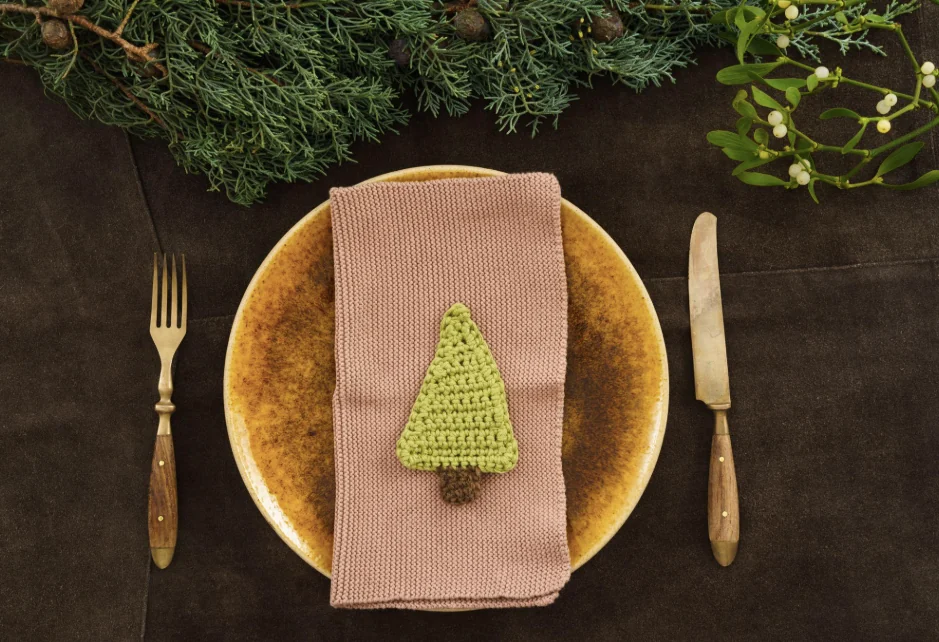
Although this pattern is designed as a hanging Christmas ornament, you can use these little crochet trees in many creative ways.
Christmas Tree Decorations
The most obvious use is hanging them on your Christmas tree.
Make several ornaments in coordinating shades of green, cream, and gold to create a consistent handmade theme.
Handmade Gift Toppers
Attach a crochet spiral Christmas tree to a wrapped gift instead of using a disposable plastic bow.
After opening the present, the recipient can remove the ornament and reuse it every Christmas.
Christmas Garland
Crochet several small trees and attach them along a length of sturdy yarn or twine.
Space them evenly and hang the garland across a mantelpiece, bookshelf, or wall.
Holiday Table Decorations
Place a small crochet tree beside each dinner plate as a decorative favour.
You could attach a handwritten name tag to each ornament and use it as a Christmas place setting.
Craft Fair Gifts
Small crochet ornaments can be useful projects for handmade gift collections or seasonal craft stalls.
If you plan to sell finished ornaments, calculate your yarn cost, packaging, labour time, and selling fees before choosing a price.
Christmas Card Embellishments
Use a smaller, flatter version of the spiral as a decorative embellishment on a handmade Christmas card.
For mailing, choose thin yarn and avoid bulky beads so the card can fit into an envelope.
Troubleshooting Common Crochet Spiral Problems
Even simple crochet projects can be frustrating when the finished fabric doesn’t behave as expected.
Here are some common problems and how to fix them.
My Crochet Strip Isn’t Curling
If your strip stays mostly flat, check whether you worked three double crochet stitches into every foundation chain.
The repeated increases are what create the curl.
If you accidentally worked only one or two stitches into several chains, the strip may not curl evenly.
You can also gently manipulate the finished strip with your fingers to encourage the spiral shape.
My Spiral Is Too Tight
A very tight foundation chain can make it difficult to work the increase groups and may distort the fabric.
Try making your starting chain with a hook one size larger, then switch back to the recommended hook for the double crochet row.
Alternatively, consciously loosen your tension when making the foundation chain.
My Christmas Tree Looks Like a Ball
This usually happens during assembly when the spiral layers are pulled too close together.
Carefully loosen the securing stitches and rearrange the curls.
Aim for a wider bottom and gradually narrower top rather than stacking every coil directly on top of the previous one.
My Tree Doesn’t Hold Its Shape
Soft yarn can produce a very flexible ornament.
Try using cotton yarn for more structure.
You can also add a few extra securing stitches between the layers to help maintain the tapered shape.
For a decorative ornament that will not be washed frequently, a small amount of fabric stiffener may help, but test it on a separate yarn swatch first.
My Star Looks Uneven
Make sure your first round contains exactly 10 single crochet stitches.
Each star point uses two stitches from that round.
If you accidentally add or skip a stitch, the points may become unevenly spaced.
Gently shape the completed star with your fingers before sewing it onto the tree.
My Ornament Hangs Sideways
The hanging loop may be attached too far to one side.
Remove the loop and reposition it closer to the centre of the top coil, directly behind the star.
Lift the ornament by the loop before fastening everything securely.
Tips for Neater, More Professional Results
Small details can make a big difference to the appearance of your handmade crochet Christmas ornaments.
First, use consistent tension throughout the spiral row. Uneven tension can create sections that curl differently.
Second, count your foundation chains before beginning the double crochet increases. Correct stitch counts help keep the pattern consistent.
Third, weave yarn tails through several stitches in different directions. This helps prevent the ends from slipping out during handling or storage.
Fourth, use matching yarn for assembly. When the sewing yarn blends with the tree, the securing stitches are less noticeable.
Finally, take your time arranging the coils before stitching them permanently. A few minutes spent adjusting the shape can make the finished ornament look much more balanced.
How to Care for Your Crochet Christmas Ornament
Handmade crochet decorations can last through many holiday seasons when stored and handled carefully.
Cleaning
If the ornament becomes dusty, gently shake it or use a soft brush to remove surface dust.
For washable yarn without delicate embellishments, spot-clean with a damp cloth and a small amount of mild detergent.
Avoid soaking ornaments with glued decorations, delicate beads, or cardboard inserts.
Always check the yarn manufacturer’s care instructions.
Drying
Allow the ornament to air-dry completely.
Place it on a clean towel and gently reshape the spiral while it is still slightly damp.
Avoid hanging a wet ornament because the weight of the water may stretch the yarn.
Storage
Store your crochet Christmas tree ornaments in a clean, dry container.
Place tissue paper between the ornaments to prevent the spiral layers from becoming compressed.
Avoid storing them under heavy decorations.
If you live in a humid environment, make sure the ornaments are completely dry before packing them away.
Frequently Asked Questions About Crochet Christmas Tree Spiral Ornaments
1. Is this crochet Christmas tree spiral ornament suitable for beginners?
Yes, this pattern is suitable for confident beginners who know how to make chains, double crochet stitches, and basic sewing stitches. The main tree uses a simple repeating increase pattern. The tiny star requires a few additional stitches, but you can replace it with a ready-made felt star if you prefer.
2. How long does it take to crochet one spiral Christmas tree?
A small ornament may take approximately 30–60 minutes, depending on your crochet speed and experience. Beginners may need longer, especially when shaping the spiral and attaching the star. This is an estimated crafting time rather than a measured test result.
3. What is the best yarn for crochet Christmas tree ornaments?
DK-weight cotton yarn is a good option because it creates defined stitches and offers some structure. Acrylic and cotton-blend yarns are also suitable. Smooth yarn is easier to work with than fuzzy yarn, especially when you are learning the pattern.
4. Can I use worsted-weight yarn instead of DK yarn?
Yes. Worsted-weight yarn will generally produce a thicker, larger ornament when used with an appropriately sized hook. Try a 4–5 mm hook, depending on the yarn label and your tension. The stitch counts can remain the same, but the finished dimensions will change.
5. Why does the crochet strip curl into a spiral?
The strip curls because you work three double crochet stitches into each foundation chain. This creates extra fabric along the row. Since the additional stitches cannot lie flat against the shorter foundation edge, the strip naturally ruffles and curls.
6. Can I make the Christmas tree without a crochet star?
Absolutely. You can leave the tree plain or add a small ribbon bow, wooden bead, felt star, or embroidered decoration at the top. The spiral tree itself is the main part of the pattern, so the topper is optional.
7. How can I make a smaller crochet Christmas tree ornament?
Start with fewer foundation chains. For example, chain 36 and work three double crochet stitches into each of the 33 available chains after the turning chain. This produces 99 double crochet stitches and a shorter spiral strip. Arrange it into a smaller tree and adjust the topper size as needed.
8. Do I need stuffing or wire to make this ornament?
No. The basic ornament does not require stuffing or wire. The crocheted spiral is shaped and secured with yarn stitches. If you want additional firmness, choose a structured cotton yarn and use extra sewing stitches between the coils.
9. Can I sell finished ornaments made using this pattern?
Yes, you may sell finished physical ornaments made from this original pattern. If you share the pattern itself, please link back to the original tutorial rather than republishing the complete instructions or redistributing the illustrations.
10. Can I wash a crochet Christmas tree spiral ornament?
That depends on the yarn and decorations. Plain ornaments made from washable yarn can often be gently hand-washed, but spot-cleaning is preferable for delicate decorative pieces. Be especially careful with beads, ribbons, stiffeners, and glued embellishments. Reshape the spiral while drying.
Final Thoughts: Make Your Own Crochet Christmas Tree Spiral Ornament
A handmade crochet Christmas tree doesn’t need to be complicated to look festive. This little spiral ornament turns a simple row of double crochet increases into a cheerful holiday decoration.
Once you understand how the strip curls and how to shape it, you can experiment with different yarns, colours, sizes, and toppers. Make a classic forest-green tree, a soft sage ornament, or a whole collection of pastel Christmas trees.
These ornaments are lovely for decorating your home, personalising gifts, and using up small amounts of leftover yarn.
The pattern’s stitch counts have been checked mathematically, but the design has not been physically tested. Your finished shape may vary with tension, yarn choice, and assembly technique.
Save this crochet Christmas tree spiral ornament tutorial for your next holiday crafting session, and enjoy creating a decoration that adds a handmade touch to your Christmas celebrations.