Easy Crochet Crop Top Pattern for Beginners – Free Step-by-Step Tutorial (XS–3XL)
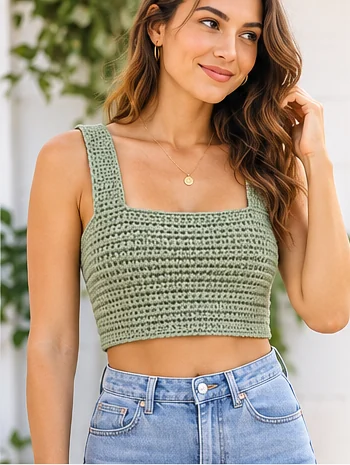
Are you looking for an easy crochet crop top pattern that is stylish, comfortable, and beginner-friendly? This free crochet tutorial will guide you through making a beautiful handmade summer top.
This crochet top is made using simple stitches, two rectangular panels, and comfortable shoulder straps. You don’t need advanced crochet skills or complicated shaping techniques.
Whether you are making your first crochet garment or expanding your handmade wardrobe, this design is a great project to try.
You can wear your finished crochet top with jeans, shorts, skirts, or layered under a cardigan.
The pattern includes seven sizes, from XS to 3XL, and you can customise the length, colour, and shoulder straps.
Why You’ll Love This Crochet Crop Top
This project is ideal for crocheters who want to start making clothes using basic stitches.
Here are some reasons to try it:
- Beginner-friendly construction using two rectangular panels.
- Seven sizes, from XS to 3XL.
- Simple half-double crochet stitches.
- Customisable length and colour.
- Comfortable square-neck design.
- Suitable for spring and summer outfits.
The design uses alternating regular and back-loop-only half-double crochet rows to create a subtle textured pattern.
You can make your top in a single colour or experiment with different stripes and decorative finishes.
Crochet Pattern Details
| Feature | Details |
|---|---|
| Skill level | Confident beginner |
| Pattern type | Crochet crop top |
| Sizes | XS–3XL |
| Crochet hook | 4 mm |
| Yarn | DK cotton or cotton blend |
| Gauge | 16 stitches × 12 rows = 4 × 4 inches |
| Main stitch | Half-double crochet |
| Terminology | US crochet terms |
Materials Needed
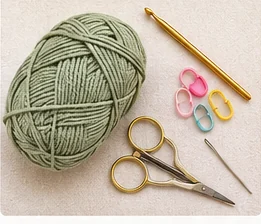
Before starting your crochet project, gather the following supplies:
- DK-weight cotton or cotton-blend yarn.
- 4 mm crochet hook.
- Stitch markers.
- Scissors.
- Yarn needle.
- Measuring tape.
You will need approximately 300–800 yards of yarn depending on your size, garment length, and tension. This is an estimated range rather than a physically verified yarn requirement.
Choosing the Right Yarn
Cotton yarn is a practical choice for summer crochet clothing because it is breathable and available in many different colours.
Cotton blends can also offer softness and comfortable drape.
For beginners, a smooth yarn is generally easier to handle than a fuzzy or highly textured yarn.
Select a yarn that feels comfortable against your skin and check its care instructions before starting.
Crochet Abbreviations
| Abbreviation | Meaning |
|---|---|
| ch | Chain |
| sc | Single crochet |
| hdc | Half-double crochet |
| sl st | Slip stitch |
| st | Stitch |
| BLO | Back loop only |
| RS | Right side |
| WS | Wrong side |
How to Make a Half-Double Crochet Stitch
- Yarn over your crochet hook.
- Insert your hook into the next stitch.
- Yarn over again and pull up a loop.
- You should have three loops on your hook.
- Yarn over and pull through all three loops.
You have now completed one half-double crochet stitch.
Practice this stitch before starting your garment if you are new to crochet.
Crochet Crop Top Size Chart
| Size | Suggested body bust | Finished bust |
|---|---|---|
| XS | 30 inches | 32 inches |
| S | 34 inches | 36 inches |
| M | 38 inches | 40 inches |
| L | 42 inches | 44 inches |
| XL | 46 inches | 48 inches |
| 2XL | 50 inches | 52 inches |
| 3XL | 54 inches | 56 inches |
The design includes approximately two inches of positive ease.
Positive ease means your finished garment is slightly larger than your body measurement.
Measure around the fullest part of your bust to help choose your size.
The figures are calculated from the target gauge, so check your measurements before beginning.
Step 1: Make a Crochet Gauge Swatch
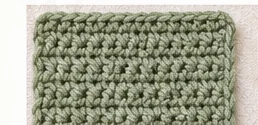
Making a gauge swatch is one of the most important steps when crocheting clothing.
Gauge determines the size of your stitches and influences the final measurements of your garment.
For this pattern, your target gauge is:
16 half-double crochet stitches × 12 rows = 4 × 4 inches (10 × 10 cm).
To make your swatch:
- Create a foundation chain wide enough for a sample larger than four inches.
- Work regular half-double crochet and back-loop-only rows alternately.
- Continue until your swatch is taller than four inches.
- Wash and dry according to your yarn instructions.
- Measure the centre of your fabric.
If you have too many stitches across four inches, try a larger hook.
If you have too few stitches, try a smaller hook.
Continue adjusting until your sample matches the required gauge.
Step 2: Crochet the Front Panel
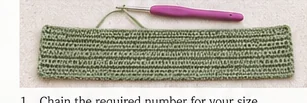
The front panel is a simple rectangle made from half-double crochet stitches.
Begin by creating the correct foundation chain for your size.
| Size | Foundation chain | Stitches per row |
|---|---|---|
| XS | 65 | 64 |
| S | 73 | 72 |
| M | 81 | 80 |
| L | 89 | 88 |
| XL | 97 | 96 |
| 2XL | 105 | 104 |
| 3XL | 113 | 112 |
Row 1
Work one half-double crochet into the second chain from the hook.
Continue working one half-double crochet into each remaining chain.
Chain one and turn.
Row 2
Work one half-double crochet in the back loop only of each stitch across the row.
Chain one and turn.
Row 3
Work one half-double crochet through both loops of every stitch.
Chain one and turn.
Row 4 and Beyond
Continue alternating Rows 2 and 3.
Repeat until the panel measures approximately 11 inches, or your preferred body length.
At the specified row gauge, 11 inches is approximately 33 rows, but measure your work to confirm the length.
Fasten off and secure the yarn.
Beginner tip: Count your stitches after each row to avoid accidentally increasing or decreasing the panel width.
Step 3: Make the Back Panel
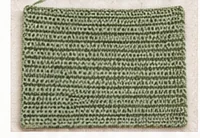
Now that your front panel is complete, it is time to make the back panel.
The back panel follows exactly the same instructions.
Start with the foundation chain required for your size.
Work alternating half-double crochet and back-loop-only half-double crochet rows.
Continue until the back panel reaches the same length as the front panel.
When both panels are finished, place them on a flat surface and compare their dimensions.
They should have approximately the same width and height.
If one panel is noticeably larger, check your stitch counts and tension before joining the pieces.
Matching panels will help create a more comfortable and symmetrical garment.
Step 4: Join the Front and Back Panels
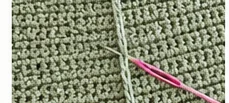
With both rectangular panels completed, you can begin assembling the body of your crochet top.
Place the front and back panels together with the right sides facing inward.
Align the edges carefully.
Using a yarn needle and matching yarn, sew the side edges together from the bottom to the top.
You can use a mattress stitch or a neat whipstitch.
Repeat on the opposite side.
Turn your garment right side out.
You should now have a tube-shaped crochet body.
Before continuing, try it on to check the circumference.
If it feels too tight or too loose, adjust the side seams or panel width before attaching the straps.
Step 5: Crochet the Shoulder Straps
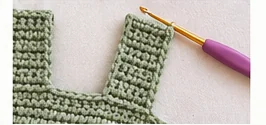
Shoulder straps give your crochet top its square-neck appearance.
Each strap is approximately two inches wide when made with eight stitches at the stated gauge.
Lay your garment flat with the front facing upward.
Measure inward from the side seams to identify where each strap should begin.
| Size | Suggested distance from side seam |
|---|---|
| XS | 1.5 inches |
| S | 2 inches |
| M | 2.5 inches |
| L | 3 inches |
| XL | 3.5 inches |
| 2XL | 4 inches |
| 3XL | 4.5 inches |
These measurements are initial placement guidelines. Adjust them for your shoulder width and preferred neckline.
Crochet the First Strap
Attach your yarn at the first marked position.
Work eight half-double crochet stitches toward the centre of the neckline.
Chain one and turn.
Work one half-double crochet into each of the eight stitches.
Repeat until your strap is long enough to reach comfortably over your shoulder to the corresponding back position.
Approximately six to ten inches can be used as a starting range, but determine the final length by trying on the garment.
Attach the strap to the back panel, ensuring it is not twisted.
Crochet the Second Strap
Repeat the same instructions for the second shoulder.
Make sure both straps are positioned symmetrically.
Try the top on before permanently joining the straps.
Adjust their length if necessary to avoid slipping or an uncomfortable neckline.
Step 6: Crochet the Neckline and Armhole Edging
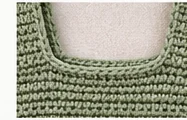
Adding crochet edging gives your handmade top a neater finish.
Neckline Edging
Attach yarn along the neckline.
Work single crochet stitches evenly around the front neckline, inner edges of the straps, and back neckline.
Join with a slip stitch.
Avoid making too many stitches along row ends, as this can create ripples.
Armhole Edging
Attach yarn near one side seam.
Work single crochet stitches around the armhole opening, including the outer strap edge.
Repeat for the opposite armhole.
Bottom Hem
Join yarn at the bottom of one side seam.
Work a round of single crochet stitches along the bottom edge.
Fasten off and weave in the remaining yarn ends.
Step 7: Finish and Block Your Crochet Top
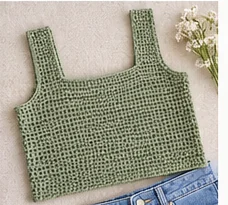
After completing the main construction, inspect your garment for loose yarn ends.
Use a yarn needle to weave them securely into the fabric.
If your yarn is suitable for wet blocking, gently wash or dampen the top and lay it flat on a towel.
Smooth the fabric into shape and allow it to dry completely.
Blocking can help the stitches settle and improve the overall appearance.
Try your finished top on again and check that the neckline, straps, and hem feel comfortable.
How to Customise Your Crochet Crop Top
One of the best things about making your own clothes is being able to personalise them.
Make a Longer Crochet Top
If you prefer more coverage, simply crochet additional rows on the front and back panels.
For example, you could make a 15-inch waist-length version or a longer 19-inch tank top.
Measure your torso to determine the length that works best for you.
If the garment extends across your hips, check whether additional width is needed.
Create a Striped Design
Instead of using one colour, experiment with stripes.
Change yarn colours every few rows to create horizontal patterns.
For a balanced appearance, repeat the same colour sequence on both the front and back panels.
Adjust the Shoulder Straps
You can make the straps wider by increasing the number of stitches in each strap row.
For additional coverage, try ten or twelve stitches instead of eight.
Check the position and fit before attaching the straps.
Add Decorative Details
You can personalise your crochet top with a contrasting border or small crochet flower.
Keep decorations lightweight so they don’t pull the fabric out of shape.
Common Crochet Crop Top Problems
Why Is My Crochet Top Too Tight?
Your gauge may be smaller than required, or you may have selected a size without enough ease.
Measure your panels and compare them with the intended dimensions.
Try a larger hook or adjust the stitch count if necessary.
Why Are My Crochet Edges Uneven?
Uneven edges often result from accidentally skipping stitches or adding extra stitches at the ends of rows.
Count your stitches regularly and use stitch markers if necessary.
Why Does My Neckline Look Wavy?
A wavy neckline may occur when too many stitches are added during edging.
Remove the edging and try again with fewer stitches.
Why Do My Shoulder Straps Slip?
The straps may be too long or positioned too close to the outer edges of your shoulders.
Shorten or reposition them for a better fit.
Why Does My Crochet Fabric Feel Stiff?
Tight tension, a small crochet hook, or firm yarn may produce stiff fabric.
Experiment with different yarns or hook sizes, remembering to check your gauge again after making changes.
How to Care for Handmade Crochet Clothing
Handmade crochet clothing requires appropriate care to preserve its shape and appearance.
Always follow the instructions on your yarn label.
When handwashing is appropriate, use cool or lukewarm water and a gentle detergent.
Avoid wringing or twisting the garment excessively.
Instead, gently press out the excess water and lay the top flat to dry.
Hanging a wet crochet garment may cause stretching, especially around the shoulder straps.
When storing your finished top, fold it neatly if hanging causes stretching.
These simple care practices can help protect the fabric and seams.
Frequently Asked Questions About Crochet Crop Tops
Is This Crochet Crop Top Pattern Good for Beginners?
Yes. The design uses basic crochet stitches and simple rectangular panels.
Beginners who already understand chain, single crochet, and half-double crochet stitches should be able to follow the main instructions.
What Is the Best Yarn for a Summer Crochet Top?
DK-weight cotton or cotton-blend yarn is a practical choice for this pattern.
Look for a comfortable, breathable yarn that produces the required gauge.
Can I Make This Crochet Top in Different Sizes?
Yes. The pattern provides foundation stitch counts for XS through 3XL.
Always check your body measurements and gauge before beginning.
Can I Use Acrylic Yarn?
You can experiment with acrylic yarn, but the fabric may have a different feel, warmth, and drape.
Make a gauge swatch to determine whether the yarn is suitable for your garment.
Can I Make This Pattern Into a Full-Length Tank Top?
Yes. Continue crocheting both rectangular panels until they reach your desired length.
Longer garments may require additional shaping or width around the hips.
Do I Need to Block My Crochet Top?
Blocking is optional but can improve the overall appearance.
Choose a method suitable for your yarn’s fibre composition and care requirements.
How Long Does It Take to Crochet a Crop Top?
The time required depends on your experience, garment size, yarn, and crochet speed.
Beginners should allow several crochet sessions to complete the garment comfortably.
Why Does My Finished Top Look Different From the Pictures?
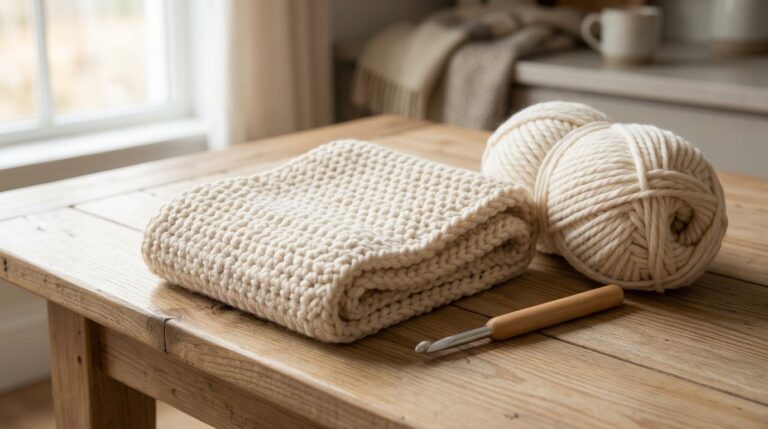
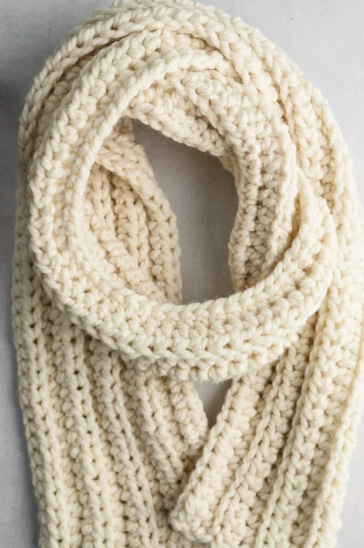
The pictures are AI-generated design illustrations, not photographs of a physically tested sample.
Your actual result depends on the stitch instructions, gauge, yarn choice, and fitting adjustments.
Final Thoughts
Learning how to crochet your own clothing is a practical and rewarding way to develop your skills.
This easy crochet crop top pattern introduces important garment-making techniques without complicated shaping.
By creating two rectangular panels, adding shoulder straps, and finishing the edges, you can build a comfortable handmade summer top.
Remember that accurate measurements and consistent stitch tension are essential when crocheting clothing.
Once you understand the construction, you can experiment with different colours, lengths, textures, and decorative finishes.
Whether this is your first crochet garment or simply a new addition to your handmade wardrobe, take your time and enjoy the creative process.