How to Crochet a Blanket for Beginners: Easy Step-by-Step Free Pattern
Crochet Patterns Idea | Free Crochet Pattern | Beginner-Friendly Tutorial
There’s something truly special about wrapping yourself in a blanket you’ve made with your own hands. Whether you’re relaxing on the sofa, decorating your bedroom, or preparing a thoughtful handmade gift, a crochet blanket brings warmth, comfort, and personality to any space.
If you’ve been wondering how to crochet a blanket for beginners, you’re in the right place. You don’t need years of crocheting experience or complicated techniques to make a beautiful blanket. With basic crochet stitches, soft yarn, and a little patience, you can create a cozy project you’ll love using every day.
One of the best things about crochet blankets is their versatility. You can choose neutral shades for a classic appearance, combine pastel colors for a soft and delicate design, or create colorful stripes for a cheerful handmade accessory.
In this detailed tutorial from Crochet Patterns Idea, you’ll learn how to make a simple striped crochet blanket from start to finish. We’ll cover the materials, basic crochet abbreviations, choosing yarn, creating the foundation chain, working the blanket rows, changing colors, adding a border, and finishing your project.
You’ll also find helpful tips, size adjustments, creative design ideas, and answers to frequently asked questions.

Why Crochet Blankets Are Perfect for Beginners
Crochet blankets are among the most rewarding projects for anyone learning how to crochet. Unlike small, complicated amigurumi toys or fitted accessories, blankets generally use repetitive stitch patterns that become easier as you progress.
Once you’ve mastered the foundation chain and one basic crochet stitch, you can make an entire blanket by repeating the same movements.
This repetition helps improve your stitch consistency, hand coordination, and confidence.
Another benefit is that crochet blankets are easy to customize. You can make a small baby blanket, a lap blanket for relaxing, a medium-sized throw, or a larger blanket for your bed.
You can also experiment with different yarn textures and color combinations to match your personal style.
Crocheting a blanket can be a relaxing activity because you can work on it a little at a time. You might complete several rows while watching television, listening to music, or enjoying a quiet afternoon.
The finished blanket becomes a practical reminder of your creativity and patience.
Crochet Blanket Pattern Overview
Skill level
Beginner
Estimated time
10–20 hours
Approximate size
33 × 36 inches
Terminology
US crochet terms
Pattern type: Simple double crochet blanket with seven-row color stripes and an optional single crochet border.
Construction: Worked flat in back-and-forth rows.
The finished dimensions are estimates based on the suggested gauge. Your blanket may be larger or smaller depending on your yarn, hook, and tension.
Materials You’ll Need to Crochet a Blanket

Before starting, gather your supplies so you can enjoy a smooth and comfortable crocheting experience.
| Material | Recommendation |
|---|---|
| Yarn | Medium-weight acrylic or cotton-blend yarn, category 4 |
| Yarn quantity | Approximately 900–1,200 yards total |
| Crochet hook | 5.5 mm (I/9), or size needed for gauge |
| Yarn needle | For weaving in yarn ends |
| Scissors | For cutting yarn |
| Stitch markers | Optional for tracking stitches |
| Measuring tape | For measuring blanket width and length |
For the striped blanket in this tutorial, choose three coordinating yarn colors:
- Pastel pink for the first stripe.
- Cream or ivory for the second stripe.
- Sage green for the third stripe.
You can use any colors you prefer, but selecting a consistent yarn weight is important for keeping the blanket even.
How to Choose the Best Yarn for a Crochet Blanket
Yarn choice affects the appearance, warmth, softness, and durability of your finished blanket.
Acrylic yarn is popular for beginner crochet blankets because it is affordable, lightweight, and often easy to wash. Many acrylic yarns are available in a wide range of colors.
Cotton yarn creates a breathable blanket with clearly defined stitches. It can be a good choice for lighter blankets, although cotton blankets may feel heavier than expected.
Wool or wool blends are useful when you want extra warmth. They are especially suitable for winter blankets, but some require careful washing.
Chenille yarn can produce an exceptionally soft and plush blanket, although its fuzzy texture may make stitches harder to see.
For your first blanket, smooth medium-weight acrylic yarn is a practical option.
Crochet Abbreviations and Basic Stitches
Before following the instructions, review these common crochet abbreviations.
| Abbreviation | Meaning |
|---|---|
| ch | Chain |
| sc | Single crochet |
| dc | Double crochet |
| sl st | Slip stitch |
| st(s) | Stitch(es) |
| rep | Repeat |
| FO | Fasten off |
| RS | Right side |
| WS | Wrong side |
This blanket uses double crochet as its main stitch and single crochet for the optional border.
How to Make a Double Crochet Stitch
Double crochet is one of the easiest stitches to learn and is ideal for beginners.
To make a double crochet:
- Wrap the yarn over your crochet hook.
- Insert the hook into the next stitch.
- Yarn over and pull up a loop.
- Yarn over and pull through the first two loops.
- Yarn over again and pull through the remaining two loops.
You have completed one double crochet stitch.
Repeat these steps to create the soft fabric used throughout your blanket.
Understanding Crochet Blanket Sizes
Blankets come in many sizes, so it’s helpful to decide what you want to make before starting.
| Blanket Type | Approximate Size |
|---|---|
| Stroller blanket | 30 × 30 inches |
| Baby blanket | 30 × 36 inches |
| Lap blanket | 36 × 48 inches |
| Small throw | 40 × 50 inches |
| Standard throw | 50 × 60 inches |
| Twin bed blanket | 66 × 90 inches |
These are general planning dimensions rather than fixed standards. You can adjust your handmade blanket to suit your needs.
The pattern below creates a smaller blanket approximately 33 × 36 inches, suitable as a cozy lap blanket or decorative throw.
For baby projects, use breathable, washable yarn and avoid loose decorations, dangling cords, or unsecured embellishments. Follow current safe-sleep guidance: loose blankets should not be placed in an infant’s sleep space.
Step-by-Step Instructions: How to Crochet a Blanket
Follow these instructions to create your own simple striped crochet blanket.
Pattern gauge: approximately 12 double crochet stitches and 7 rows per 4 inches. Check your gauge before beginning for more predictable dimensions.
Step 1: Create Your Foundation Chain

Begin with your pastel pink yarn and make a slip knot.
Place the slip knot onto your crochet hook and tighten it gently.
Now create a foundation chain of 103 stitches.
Try to keep the chain relaxed and evenly sized.
The foundation chain determines the width of your blanket. If your stitches are too tight, the lower edge may pull inward and make the blanket narrower than the upper rows.
Count carefully to ensure you have exactly 103 chains.
For this pattern, the first three chains will provide the turning height, and the remaining chains will form the first row of double crochet stitches.
Step 2: Crochet the First Row

After completing the foundation chain, you’re ready to create the first row.
Row 1: Work one double crochet into the fourth chain from your hook.
Continue making one double crochet into every remaining chain.
At the end of the row, you should have 100 double crochet stitches, counting the initial skipped three chains as the turning chain rather than an additional stitch.
For clarity, this pattern counts the first worked double crochet as stitch one, so the skipped chains are not included in the 100-stitch total.
Chain two and turn your work.
Your first row should look like a long strip of evenly spaced double crochet stitches.
Step 3: Continue Building the Blanket

marketplace.ultimatemotorcycling.com
Now continue creating the main fabric.
Rows 2–7: Work one double crochet in each of the 100 stitches across.
At the end of every row, chain two and turn your work. The chain two does not count as a stitch.
Every row should contain exactly 100 double crochet stitches.
The fabric will gradually increase in length as you continue.
Take a moment after each row to check that the edges remain reasonably straight.
If you accidentally miss a stitch, your blanket may begin to narrow. If you add extra stitches, the edges may become wider.
Using stitch markers at both ends can help you identify the first and final stitches.
Step 4: Change to Cream Yarn

After finishing seven pink rows, introduce your cream-colored yarn.
Changing colors is an easy way to create a decorative striped blanket.
To change yarn colors neatly, work the last double crochet of row 7 until two loops remain on your hook.
Cut the pink yarn, leaving a tail approximately six inches long.
Yarn over with the cream yarn and pull it through the final two loops to complete the stitch.
Chain two with the cream yarn and turn your work.
Rows 8–14: Work 100 double crochet stitches across each row using cream yarn.
Your blanket will now have two soft color sections.
When changing colors, avoid pulling the yarn tails too tightly. This can distort the edge of your blanket.
Step 5: Add the Sage Green Stripe

Once you have completed seven cream rows, switch to sage green yarn.
Use the same color-changing method as before.
Rows 15–21: Crochet 100 double crochet stitches across each row using sage green yarn.
Your blanket should now have three sections: pink, cream, and sage green.
These gentle colors create a soft, calming appearance that works beautifully in bedrooms, nurseries, or cozy living spaces.
Continue checking your stitch count and maintaining consistent yarn tension.
Step 6: Repeat the Stripe Pattern

To make your blanket longer, repeat the same sequence of seven-row color stripes.
Use this color schedule:
| Rows | Color |
|---|---|
| 1–7 | Pink |
| 8–14 | Cream |
| 15–21 | Sage green |
| 22–28 | Pink |
| 29–35 | Cream |
| 36–42 | Sage green |
| 43–49 | Pink |
| 50–56 | Cream |
| 57–63 | Sage green |
Each row contains 100 double crochet stitches.
After 63 rows, your blanket should measure approximately 36 inches long at the suggested gauge.
Measure your project before finishing. If you want a longer blanket, simply continue repeating the stripe sequence.
You can also customize the width by changing the foundation chain length. Add one foundation chain for each additional double crochet stitch you want across the blanket.
Step 7: Add a Simple Crochet Border

A border gives your blanket a more finished appearance and can help smooth slightly uneven edges.
Choose cream yarn for a clean, coordinated border.
Attach your yarn at any corner of the blanket.
Work one single crochet into each stitch along the top and bottom edges.
Along the sides, space single crochet stitches evenly across the row ends. Because double crochet rows are relatively tall, you will usually need approximately two or three single crochets for every two row ends, adjusting the spacing to prevent puckering or rippling.
At each corner, work three single crochet stitches into the corner space.
Continue around all four sides of the blanket.
When you reach the starting point, join with a slip stitch.
If you’d like a slightly thicker border, work another round of single crochet.
A neat border can help the blanket look polished without requiring advanced decorative stitches.
Step 8: Weave in the Yarn Ends

After finishing the border, use a yarn needle to secure all remaining yarn tails.
Thread one yarn tail through your needle and weave it through several stitches on the wrong side of the blanket.
Change direction at least once to help keep the yarn secure.
Repeat for every yarn tail.
Be careful not to pull the yarn too tightly while weaving. Tightening the tails excessively can distort the fabric.
Once all tails are secure, trim the excess yarn.
This step may take a little time, especially if you’ve changed colors frequently, but it greatly improves the blanket’s durability and overall appearance.
Step 9: Gently Shape or Block Your Blanket

Blocking is an optional finishing technique that can help your blanket lie flatter.
Before blocking, check the washing and care instructions for your chosen yarn.
For fibers suitable for wet blocking, lightly dampen the blanket and lay it flat on a clean towel or blocking surface.
Gently shape the edges and corners without stretching the fabric excessively.
Allow the blanket to dry completely before folding or using it.
Blocking is particularly helpful if your blanket has uneven edges or slight curling.
Step 10: Enjoy Your Handmade Crochet Blanket

Congratulations! You’ve finished your handmade crochet blanket.
Give the blanket a gentle shake to help the stitches settle naturally.
You can now drape it across your sofa, place it at the foot of your bed, or wrap it around your shoulders during a relaxing evening.
If you’re planning to give the blanket as a gift, consider folding it neatly and tying it with a fabric ribbon.
A handmade blanket is a thoughtful present because it represents time, care, and creativity.
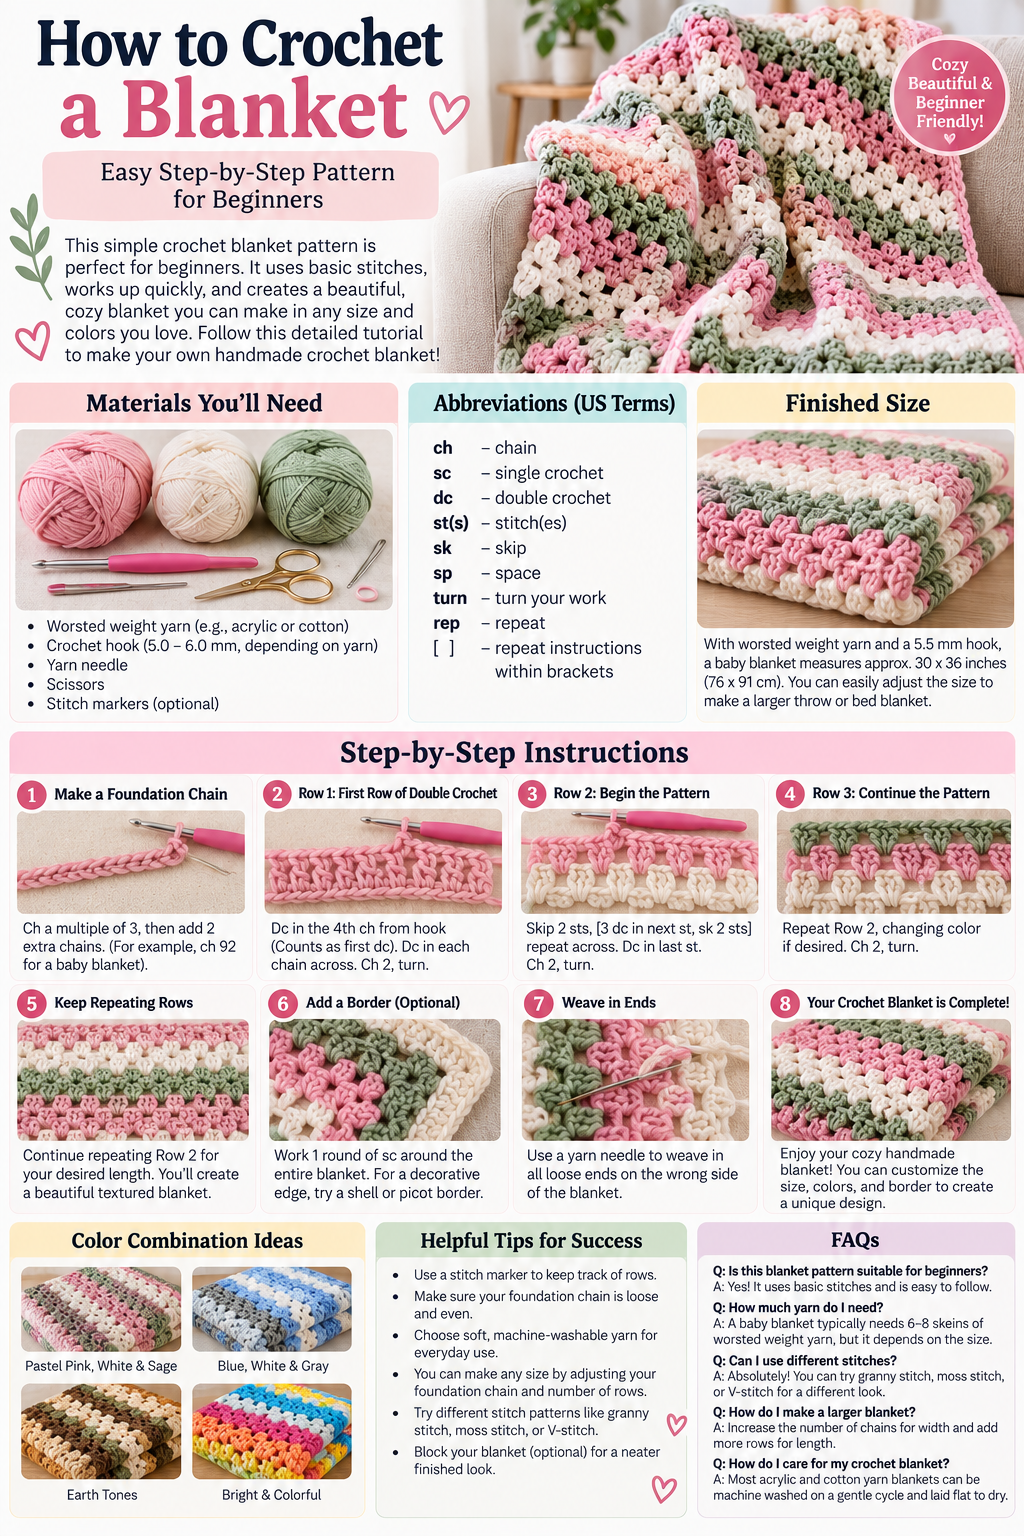
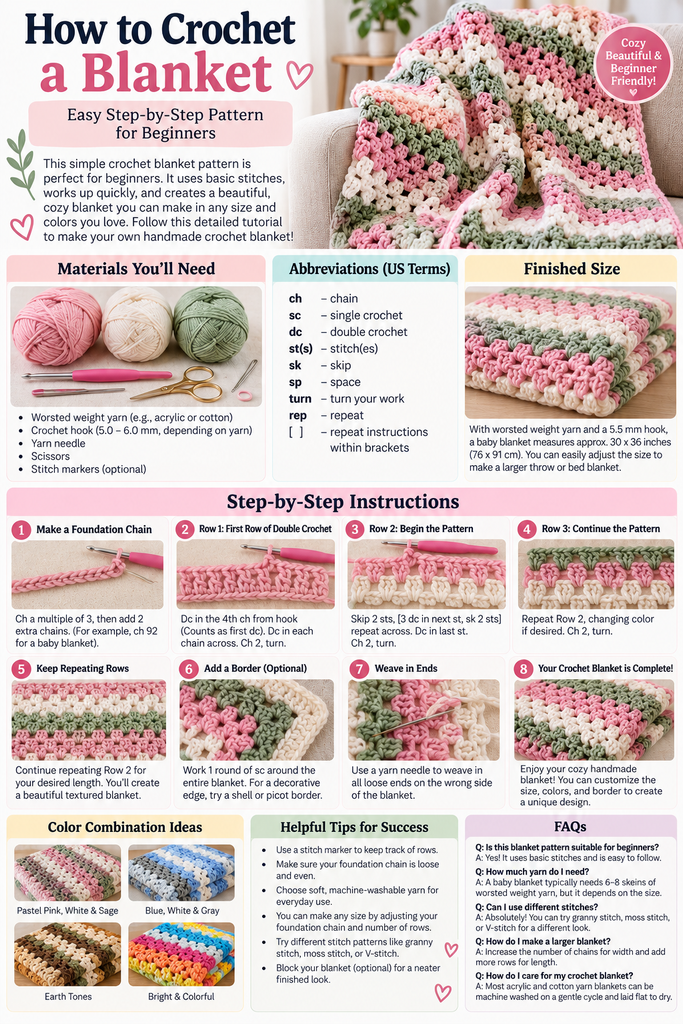
Illustrated Crochet Blanket Tutorial
This visual guide provides inspiration for crochet blanket supplies, stitch techniques, color combinations, finishing details, and project ideas.
Illustrated step-by-step crochet blanket tutorial with materials, stitches, pastel color combinations and finishing instructionsThe infographic illustrates a decorative textured blanket variation. For the exact beginner-friendly double crochet pattern, use the written row-by-row instructions above.