How to Crochet a Newborn Baby Set: Easy Hat, Booties, and Headband Pattern for Beginners
How to Crochet a Newborn Baby Set: Easy Free Pattern
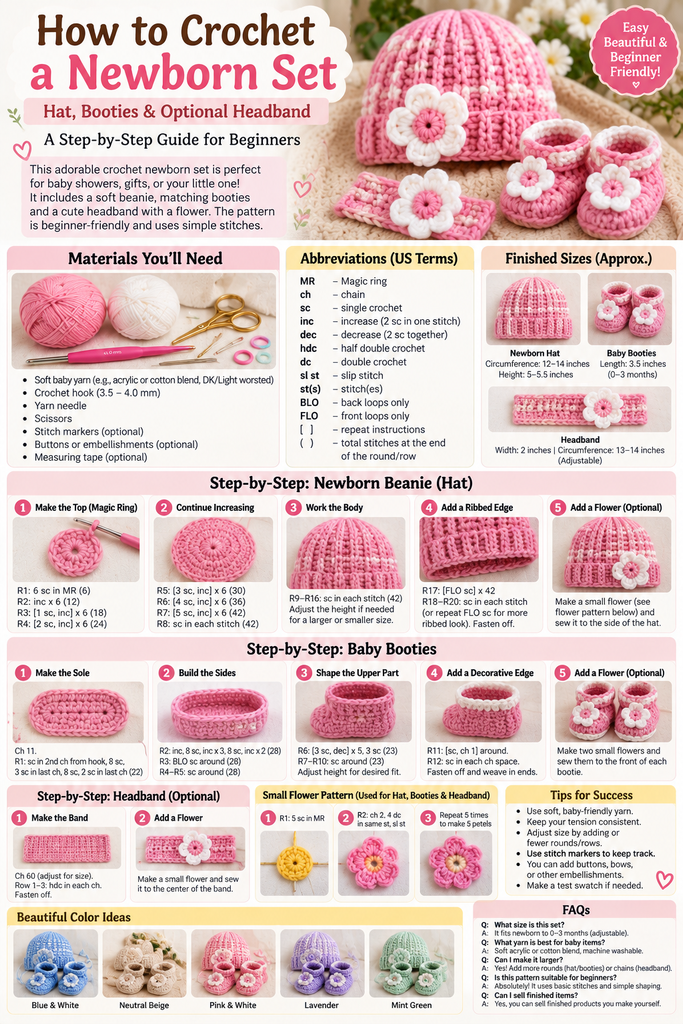
There’s something incredibly special about creating handmade clothing and accessories for a newborn baby. Whether you’re preparing for a new arrival, making a thoughtful baby shower gift, or exploring your next crochet project, a beautiful newborn crochet set is a wonderful choice.
Crocheting baby accessories allows you to combine creativity with practical handmade gifts. Tiny baby hats, soft booties, and delicate headbands are adorable projects that don’t require large amounts of yarn.
If you’re a beginner, you might think that creating a complete baby crochet set is complicated. However, with a little patience and an understanding of basic crochet stitches, you can make a matching collection of accessories.
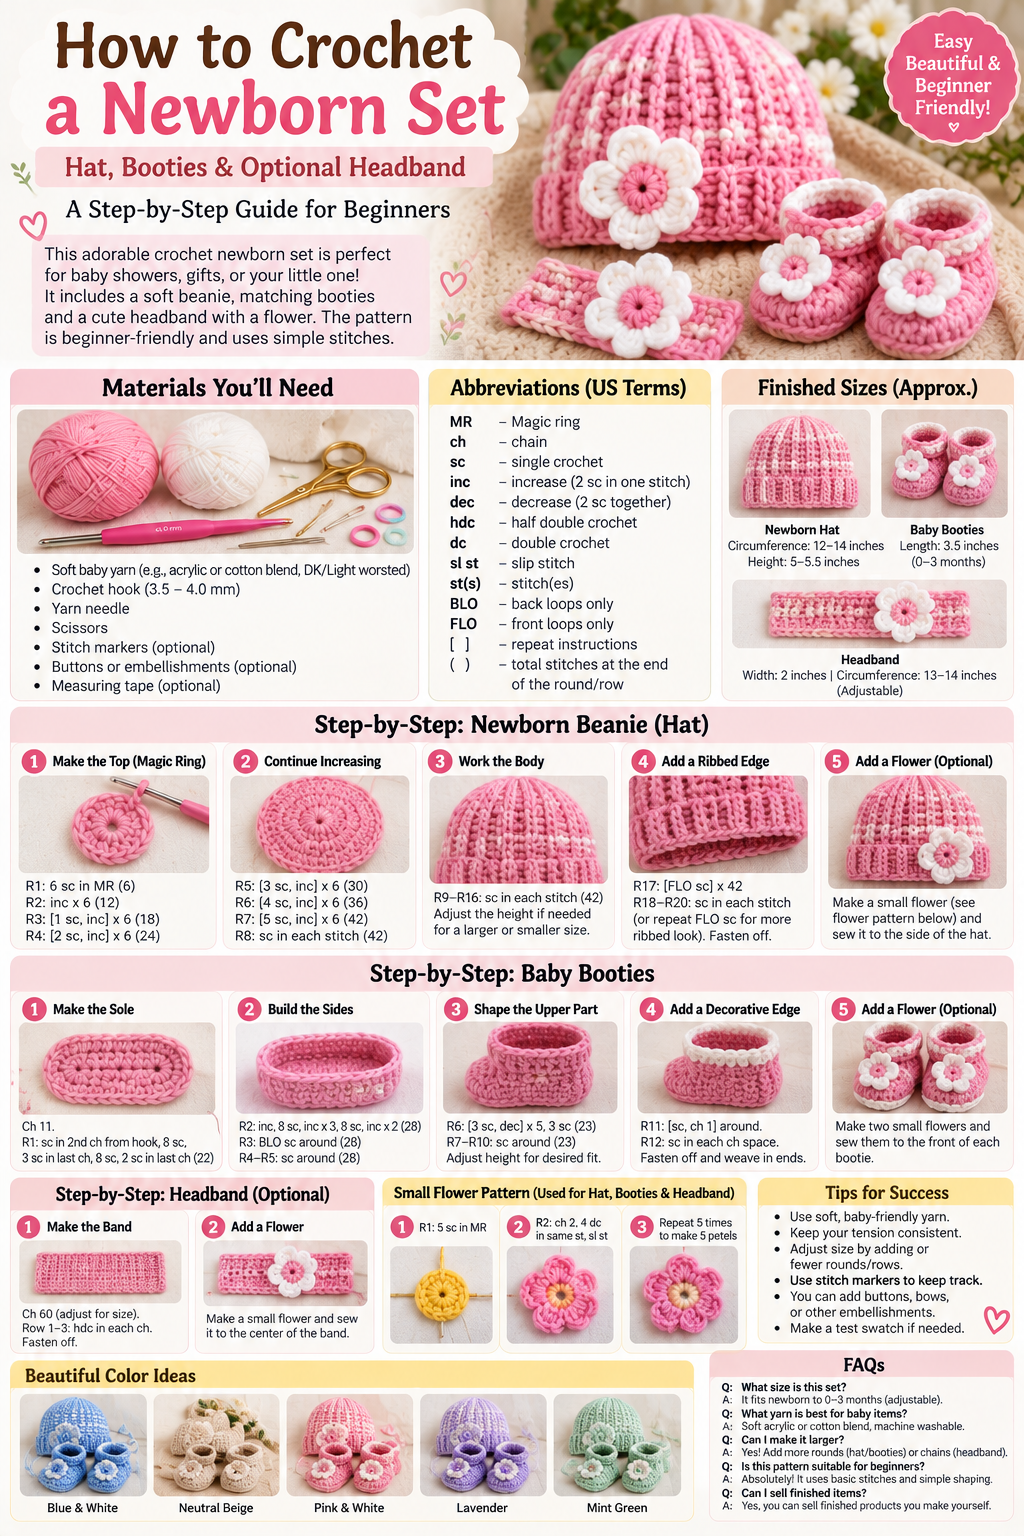
In this detailed tutorial from Crochet Patterns Idea, you’ll learn how to crochet a newborn baby hat, a pair of matching booties, and an optional decorative headband. We’ll guide you through choosing the right materials, understanding crochet abbreviations, following the patterns, adjusting sizes, and finishing each piece.
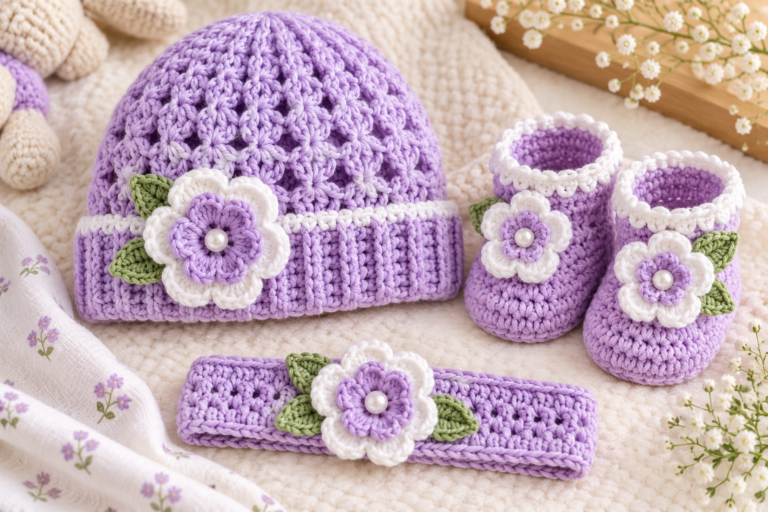
This project features a lovely pink-and-white color combination, but you can easily personalize the set using your favorite shades.

Why You’ll Love This Newborn Crochet Set
One of the best things about crocheting for newborns is that baby accessories are relatively small projects.
Compared with large crochet blankets or adult sweaters, newborn hats and booties require less yarn and can often be completed in a shorter amount of time.
This particular set is designed around simple crochet techniques, making it a useful project for beginners who want to improve their skills.
The matching hat and booties create a coordinated appearance, while the optional headband adds a decorative touch for supervised photographs or special occasions.
Another advantage is the flexibility of the design. You can use soft pastel pink for a traditional baby gift, neutral cream for a timeless appearance, or mint green and lavender for a playful alternative.
These handmade accessories can also become meaningful keepsakes, especially when created for a family member or close friend.
Newborn Crochet Pattern Overview
Skill Level
Confident Beginner
Estimated Time
4–7 hours for the set
Suggested Age
Newborn, approximately 0–3 months
Terminology
US crochet terms
The set includes a basic crocheted baby beanie, two soft booties, and an optional flower headband. Fit depends on the actual baby’s measurements and your crochet gauge.
Materials Needed for a Newborn Crochet Set

Choosing appropriate materials is especially important when crocheting accessories for newborn babies.
Baby skin is delicate, so the yarn should feel soft and comfortable rather than rough or scratchy.
Essential Supplies
| Material | Recommended Use |
|---|---|
| Soft DK-weight baby yarn | Main hat, booties, and headband |
| White yarn | Optional decorative trim |
| 4.0 mm crochet hook | Main crochet projects |
| 3.5 mm hook | Optional smaller flowers |
| Yarn needle | Sewing and weaving ends |
| Scissors | Cutting yarn |
| Stitch markers | Tracking rounds and stitches |
| Measuring tape | Checking size and fit |
For this project, approximately 150–220 yards of yarn is a useful starting estimate, although the exact amount depends on your gauge and the size of each accessory.
What Yarn Is Best for Newborn Crochet Projects?
Soft acrylic, cotton, and cotton-acrylic blend yarns are common choices for baby crochet accessories.
Acrylic baby yarn is often lightweight, affordable, and easy to care for. Many varieties are machine washable, which is convenient for baby clothing.
Cotton yarn is breathable and provides good stitch definition, making it suitable for lightweight accessories.
Cotton-acrylic blends can offer a balance of softness, breathability, and durability.
Whatever yarn you select, avoid fibers that shed heavily, feel scratchy, or have loose decorative strands that a baby could pull into their mouth.
Crochet Abbreviations Used in This Pattern
Before starting, review the following abbreviations.
| Abbreviation | Meaning |
|---|---|
| MR | Magic ring |
| ch | Chain |
| sc | Single crochet |
| hdc | Half double crochet |
| dc | Double crochet |
| inc | Increase |
| dec | Decrease |
| sl st | Slip stitch |
| BLO | Back loop only |
| st(s) | Stitch(es) |
| FO | Fasten off |
All instructions use US crochet terminology.
For joined rounds, slip stitches and starting chains do not count as stitches unless the pattern specifically states otherwise.
Part 1: How to Crochet a Newborn Baby Hat

A handmade baby hat is a lovely beginner crochet project.
The pattern below begins at the crown and gradually increases to create a rounded shape. After establishing the crown, you’ll crochet several even rounds to form the sides.
Newborn Hat Measurements
The intended finished hat circumference is approximately 13–14 inches, with a height of around 5–5.5 inches.
These dimensions are approximate. Always measure your crochet work and compare the result with the baby’s actual head measurement.
For this particular pattern, aim for a gauge of approximately 12 half double crochet stitches and 10 rounds per 4 inches, measured in the round.
Step 1: Create the Magic Ring
Start with pink yarn.
Make a magic ring and work eight half double crochet stitches into the center.
Round 1: 8 hdc into MR (8).
Pull the yarn tail gently to close the center.
Join with a slip stitch into the first half double crochet.
The magic ring creates the small circular opening at the crown of the hat.
Step 2: Increase the Crown
Continue crocheting in joined rounds.
- Round 2: 2 hdc in each stitch around (16).
- Round 3: [1 hdc, inc] repeat 8 times (24).
- Round 4: [2 hdc, inc] repeat 8 times (32).
- Round 5: [3 hdc, inc] repeat 8 times (40).
- Round 6: [4 hdc, inc] repeat 8 times (48).
For each round, chain one to begin and join with a slip stitch at the end. The chain one does not count as a stitch.
At the suggested gauge, 48 stitches should create approximately a 13–14-inch circumference, depending on your yarn and tension.
Step 3: Crochet the Body of the Hat

Once the crown reaches your required size, stop increasing.
Rounds 7–13: Work one hdc in each stitch around (48 stitches per round).
Continue using joined rounds.
Your project should begin taking the shape of a small baby hat.
Measure the height regularly. If your crochet gauge differs from the suggested gauge, you may need additional rounds or fewer rounds to achieve the intended length.
Step 4: Create the Hat Edging
For the final edge, switch to single crochet.
Round 14: Work one sc in each stitch around (48).
Round 15: Work one sc in each stitch around (48).
Join with a slip stitch and fasten off.
This creates a neat, simple edge around the opening.
If you prefer a contrasting border, use cream or white yarn for the final two rounds.
Avoid creating a tight brim because the hat should sit comfortably without leaving deep pressure marks.
Step 5: Finish the Newborn Hat
Thread the remaining yarn tail through a yarn needle.
Weave the end securely through the inside stitches, then trim any excess yarn.
Gently shape the hat with your hands.
You can leave the hat plain or add a small embroidered design.
If you choose to attach a crocheted flower, sew it very securely and use the hat only during supervised, awake wear. For the simplest and safest design, leave off raised decorations.
Safety reminder: Remove the hat before placing the baby down to sleep. Hats are generally not recommended indoors once a newborn is home and settled, because of overheating concerns.
Part 2: How to Crochet Newborn Baby Booties

Baby booties are another beautiful crochet project that makes a handmade gift feel extra special.
These small booties are designed for pre-walking babies and feature a flat oval sole, gently raised sides, and a shaped toe.
Unlike adult slippers, newborn booties are not intended for walking.
Newborn Booties Size Guide
For this pattern, the target sole length is approximately 3.5 inches.
The instructions provide a starting stitch count, but you should compare your actual work with the intended measurements.
Make two matching booties.
Step 1: Crochet the Bootie Sole
Begin with pink yarn.
Round 1: Chain 10.
Starting in the second chain from the hook, work:
- 2 sc in the first chain.
- 1 sc in each of the next 7 chains.
- 3 sc in the last chain.
- Rotate to work along the unused loops on the opposite side of the foundation chain.
- 1 sc in each of the next 7 chains.
- 1 sc into the remaining end chain.
You should have 20 stitches.
Join with a slip stitch.
This creates the first oval-shaped sole.
Round 2: Chain one, then work:
- 2 sc in each of the first 2 stitches.
- 1 sc in each of the next 7 stitches.
- 2 sc in each of the next 3 stitches.
- 1 sc in each of the next 7 stitches.
- 2 sc in the final stitch.
You should have 26 stitches.
Join with a slip stitch.
The sole should now look like a small, elongated oval.
Check the sole length. If it is significantly smaller or larger than your target size, adjust your hook or yarn before continuing rather than guessing with additional increases.
Step 2: Build the Bootie Sides

Now begin building the sides of the bootie.
Round 3: Work one sc into the back loop only of each stitch around (26).
Using the back loops helps create a defined transition between the sole and the side walls.
Rounds 4–5: Work one sc into each stitch around (26).
The bootie should now resemble a small shallow slipper.
Keep your stitches even, and avoid pulling your yarn too tightly.
Step 3: Shape the Toe
To create the rounded front of the bootie, you’ll decrease a few stitches across the toe section.
Place a stitch marker at the center of the toe, opposite the back of the heel.
Round 6: Work 1 sc in each of the first 8 stitches, then 5 decreases, followed by 1 sc in each of the remaining 8 stitches (21).
Round 7: Work 1 sc in each of the first 7 stitches, then 3 decreases, followed by 1 sc in each of the remaining 8 stitches (18).
These decreases help pull the fabric upward and inward, creating the bootie’s toe shape.
If the upper part feels too tight, check your stitch count and compare the opening with the intended fit.
Step 4: Crochet the Ankle Opening
Rounds 8–9: Work one sc in each stitch around (18).
For the final round, switch to white yarn if desired.
Round 10: Work one sc in each stitch around (18).
Join with a slip stitch and fasten off.
The finished bootie should have a simple opening that comfortably accommodates the baby’s foot.
Make sure it is neither restrictive nor so loose that it slips off easily.
Step 5: Make the Second Bootie

Repeat the entire bootie pattern for the second foot.
Use the same yarn, hook, tension, and stitch counts to keep the booties consistent.
Compare both soles before finishing.
Once complete, weave the yarn tails securely into the inside stitches.
Avoid beads, buttons, ties, or other detachable embellishments. They can create choking or entanglement hazards for infants.
Part 3: How to Crochet an Optional Baby Headband

A matching headband can make your crochet set particularly attractive for special occasions and newborn photography.
However, headbands are decorative accessories rather than everyday essentials. They should be used only for supervised, awake photo sessions and removed immediately afterward. Never leave one on a sleeping or unattended baby.
Step 1: Make the Foundation Chain
Using pink yarn, chain enough stitches to create a band that fits comfortably around the baby’s head without pressure.
For example, chain 45 as a starting point, then measure the length.
Do not rely on stitch count alone, since different yarns and tensions produce different measurements.
Step 2: Crochet the Headband
Work one single crochet into the second chain from your hook.
Continue working single crochet stitches across the row.
Chain one and turn.
Repeat for approximately three or four rows until the headband reaches your desired width.
For a newborn, keep the band relatively narrow and soft.
Step 3: Join the Ends
Bring the two short ends together.
Use a yarn needle to sew the ends securely, creating a continuous loop.
Check that the seam lies flat and does not create a bulky ridge.
Step 4: Add an Optional Flower
You can use the simple crochet flower pattern below to make a matching decorative detail.
Sew the flower firmly to the front of the headband, ensuring there are no loose strands or removable parts.
For a more understated design, skip the flower and leave the headband plain.